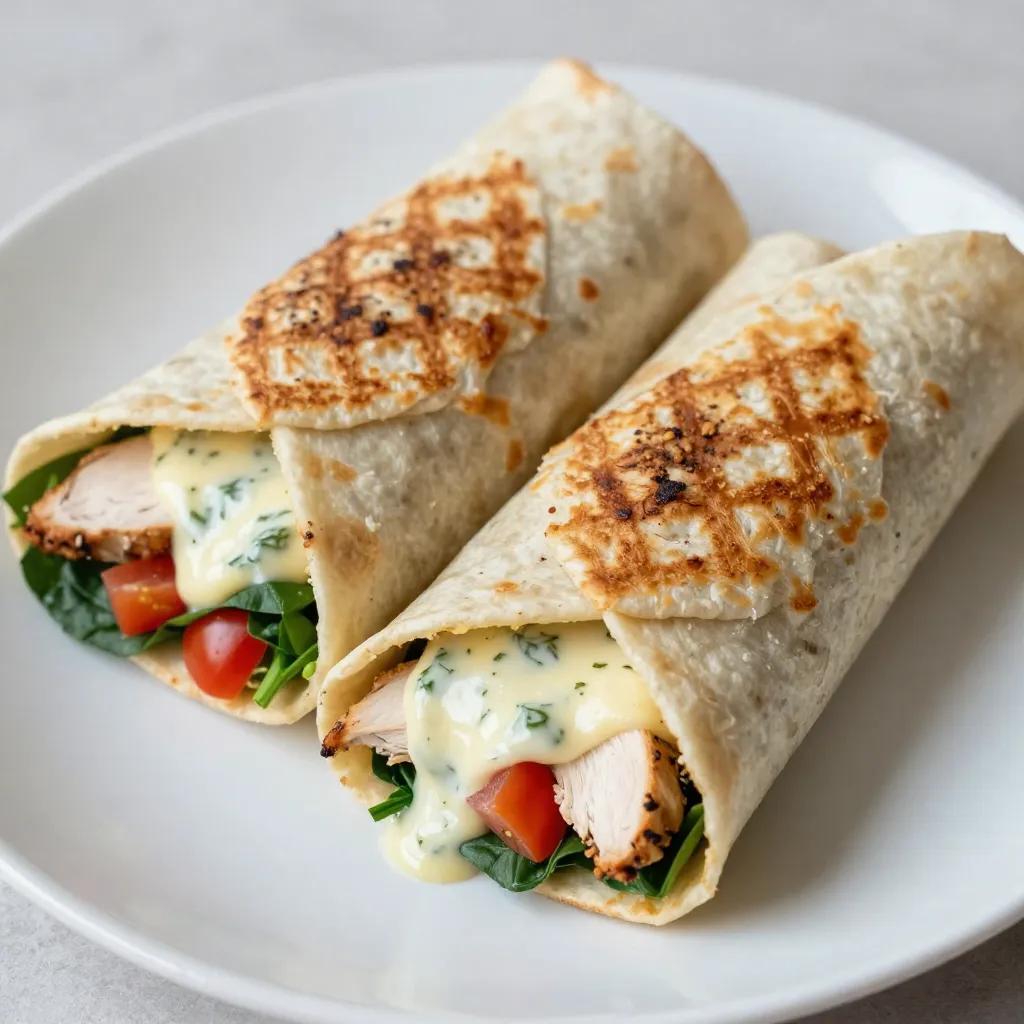
Are you ready to take your wrap game to the next level? These Cheesy Garlic Chicken Wraps are not just flavorful; they’re also super easy to make. With a creamy garlic mix and juicy chicken, you’ll have a dish that pleases everyone. Whether you’re cooking for family or having friends over, this recipe is a must-try. Let’s dive into the ingredients and get started on this delicious journey!
Why I Love This Recipe
- Quick and Easy: This recipe comes together in just 30 minutes, making it perfect for busy weeknights.
- Cheesy Goodness: The combination of cream cheese and mozzarella creates a rich, creamy filling that is irresistible.
- Customizable: Feel free to add your favorite veggies or swap proteins to make this wrap your own!
- Great for Meal Prep: These wraps can be made ahead and stored, making them a convenient option for lunches or snacks.
Ingredients
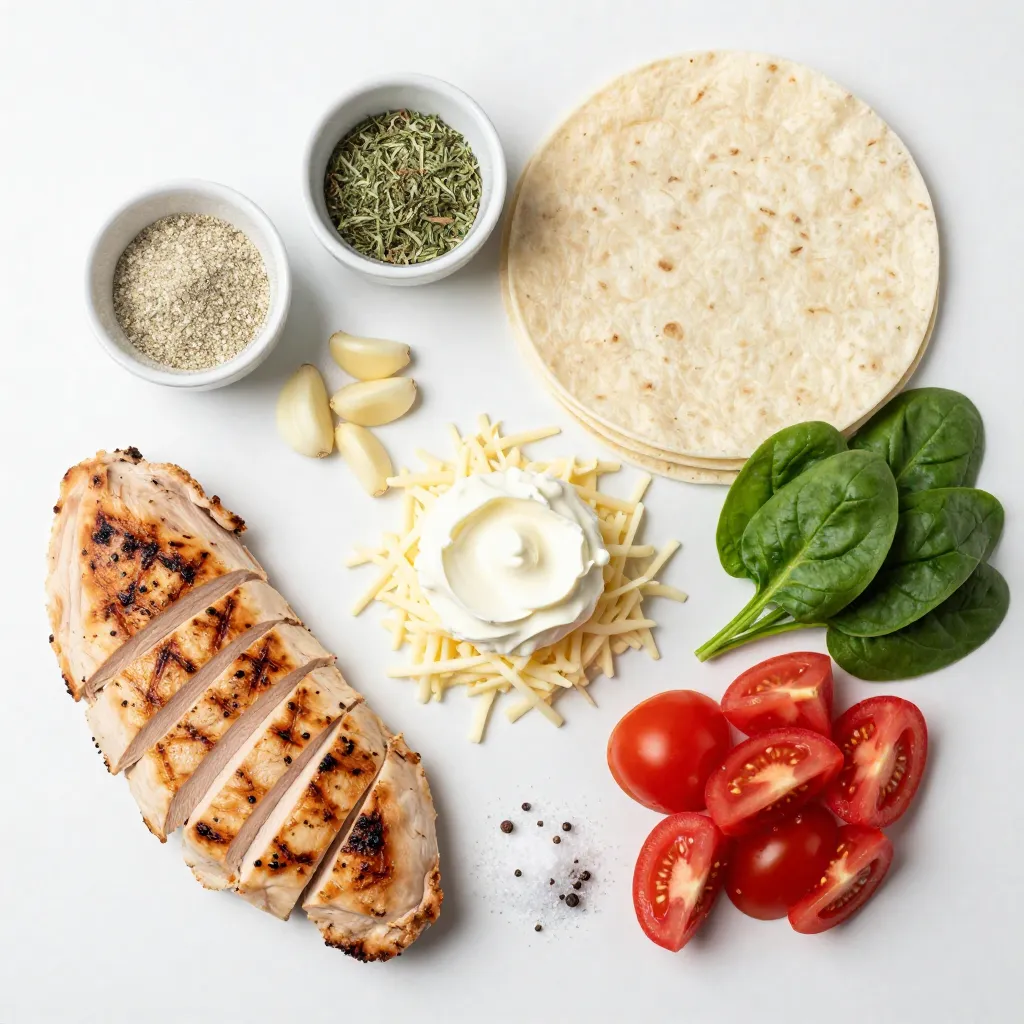
List of Ingredients
– 2 boneless chicken breasts, grilled and sliced
– 1 cup shredded mozzarella cheese
– 1/2 cup cream cheese, softened
– 3 cloves garlic, minced
– 1/2 teaspoon garlic powder
– 1/2 teaspoon dried Italian herbs (oregano, basil)
– 4 large tortillas (flour or whole wheat)
– 1 cup baby spinach leaves
– 1/2 cup diced tomatoes
– 1/2 teaspoon salt
– 1/4 teaspoon black pepper
– Cooking spray or olive oil for grilling
Selected Cooking Tools
– Mixing bowl
– Skillet
– Spatula
– Knife
– Cutting board
– Measuring cups and spoons
Optional Ingredients for Flavor Enhancement
– Sliced olives for a briny kick
– Jalapeños for some heat
– Avocado slices for creaminess
– Fresh herbs like parsley or basil for garnish
– Ranch or marinara sauce for dipping
Step-by-Step Instructions
Preparation of the Garlic Cream Cheese Mixture
Start by gathering your ingredients. You need cream cheese, minced garlic, garlic powder, dried herbs, salt, and pepper. In a mixing bowl, add the softened cream cheese. Then, mix in the minced garlic, garlic powder, and dried Italian herbs. Add salt and black pepper too. Stir everything together until it’s creamy and smooth. This mixture adds a rich garlic flavor to the wraps.
Assembling the Wraps
Now it’s time to assemble your wraps. Take a large tortilla and place it on a clean surface. Use a spoon to spread a generous amount of the garlic cream cheese mixture on the tortilla. Leave about an inch of space around the edges. Next, add the sliced grilled chicken on top. Sprinkle shredded mozzarella cheese, diced tomatoes, and baby spinach leaves evenly over the chicken.
Once you have all your fillings, start rolling the tortilla from one end. Tuck in the sides as you roll to keep the filling inside. Ensure it’s tight, but not too tight. Repeat this for each tortilla until all wraps are filled.
Cooking the Wraps
To cook the wraps, preheat a skillet over medium heat. Lightly grease the skillet with cooking spray or olive oil. Place each wrap seam-side down in the skillet. Cook for 3 to 4 minutes until the bottom is golden brown. Then, flip the wraps over carefully. Cook the other side for another 3 to 4 minutes. This step helps melt the cheese and warms the filling.
Once they are golden and crispy, remove the wraps from the skillet. Let them sit for about a minute before slicing them in half. This helps keep the filling from spilling out. Enjoy your cheesy garlic chicken wraps!
Tips & Tricks
Cooking Tips for Perfectly Crisp Wraps
To make your wraps crisp and golden, follow these tips:
– Use medium heat on your skillet. Too high can burn the wraps.
– Add a sprinkle of cheese on the outside of the wrap. This gives a nice crust.
– Make sure to grease your skillet well with cooking spray or olive oil. This helps prevent sticking.
– Cook each side for 3-4 minutes. This will ensure the cheese melts and the wrap gets crisp.
Best Practices for Ingredient Substitutions
You can swap ingredients based on your taste. Here are some ideas:
– Use chicken thighs instead of breasts for more flavor.
– Try ricotta or goat cheese if you want a different taste.
– For a low-carb option, use lettuce leaves instead of tortillas.
– Add veggies like bell peppers or mushrooms for extra crunch and nutrition.
How to Serve and Present Cheesy Garlic Chicken Wraps
Presentation makes a big difference. Here’s how to serve them nicely:
– Serve the wraps warm for the best flavor.
– Cut them in half for easier eating.
– Place a small bowl of ranch or marinara sauce on the side for dipping.
– Garnish with fresh herbs like basil or parsley. This adds a bright color and fresh taste.
– Use a colorful plate to make your meal pop!
Pro Tips
- Use Fresh Herbs: Fresh herbs can elevate the flavor of your wraps. Consider adding fresh basil or parsley for a burst of freshness.
- Grill the Wraps: For an extra crispy texture, grill the wraps on a panini press or outdoor grill instead of a skillet.
- Customize the Filling: Feel free to add other vegetables like bell peppers or onions, or substitute the chicken with turkey or a plant-based protein.
- Make Ahead: You can prepare the filling ahead of time and assemble the wraps just before cooking to save time during busy weeknights.
Variations
Vegetarian Cheesy Garlic Wraps
You can easily make a tasty vegetarian version. Start by omitting the chicken. Instead, add more veggies. Use grilled zucchini, bell peppers, or mushrooms. These add great flavor and texture. You can still use the same creamy garlic mix. Add extra spinach and diced tomatoes for color. This version is just as cheesy and delicious!
Spicy Cheesy Chicken Wraps
For those who like heat, try spicy cheesy chicken wraps. Mix in some diced jalapeños or hot sauce into the creamy garlic mix. Add some pepper jack cheese for extra spice. You can also use spicy grilled chicken. This twist will warm your taste buds and keep things exciting!
Different Cheese Options
Cheese is key in these wraps. While mozzarella is a great choice, you can try others. Cheddar cheese adds a sharp flavor. Gouda lends a rich, smoky taste. For a tangy bite, opt for feta or blue cheese. Explore different cheeses to find your favorite mix. Each cheese gives a unique twist to the dish!
Storage Info
Best Way to Store Leftover Wraps
To keep your cheesy garlic chicken wraps fresh, place them in an airtight container. You can also wrap them tightly in plastic wrap. This will help prevent air from getting in and keep them tasty. If you plan to eat them soon, store them in the fridge. Enjoy your wraps within a few days for the best taste.
Reheating Instructions
When you are ready to eat your wraps, reheating is key. You can use a skillet or microwave. For the skillet, heat it over medium-low heat. Place the wraps in the skillet and cook for about 3-4 minutes on each side. This will make them warm and crispy. If using a microwave, wrap each one in a damp paper towel. Heat for about 30-60 seconds. This keeps them moist.
Shelf Life of Prepared Wraps
The shelf life of your cheesy garlic chicken wraps depends on storage. In the fridge, they last about 3-4 days. If you want to store them longer, consider freezing them. Wrap each one in plastic wrap and place in a freezer bag. They can last for up to 2-3 months in the freezer. Just remember to thaw them in the fridge before reheating.
FAQs
Can I use a different type of cheese?
Yes, you can use different cheeses. Try cheddar, gouda, or pepper jack. Each cheese adds its own flavor. If you like it spicy, pepper jack is great. For a milder taste, use gouda. Just remember to shred or slice the cheese so it melts well. Mix and match cheeses for fun flavors!
How can I make these wraps ahead of time?
You can make these wraps ahead easily. Prepare the filling and spread on the tortillas. Roll them up, but do not cook them yet. Wrap each one in plastic wrap. Store in the fridge for up to a day. When ready to eat, just cook them in the skillet. They will taste fresh and delicious!
Are there gluten-free options for this recipe?
Yes, you can make these wraps gluten-free. Use gluten-free tortillas instead of regular ones. Many stores sell good options now. Check the label to ensure they meet your needs. The rest of the recipe stays the same. Enjoy your tasty wraps without worry!
You learned how to make tasty cheesy garlic chicken wraps with simple steps. We covered the best ingredients, tools, and cooking tips. You can even try fun variations to match your taste. Remember, storing and reheating wraps properly keeps them fresh. Don’t hesitate to experiment with different cheeses and flavors. Enjoy your cheesy garlic wraps, and feel proud of your cooking skill