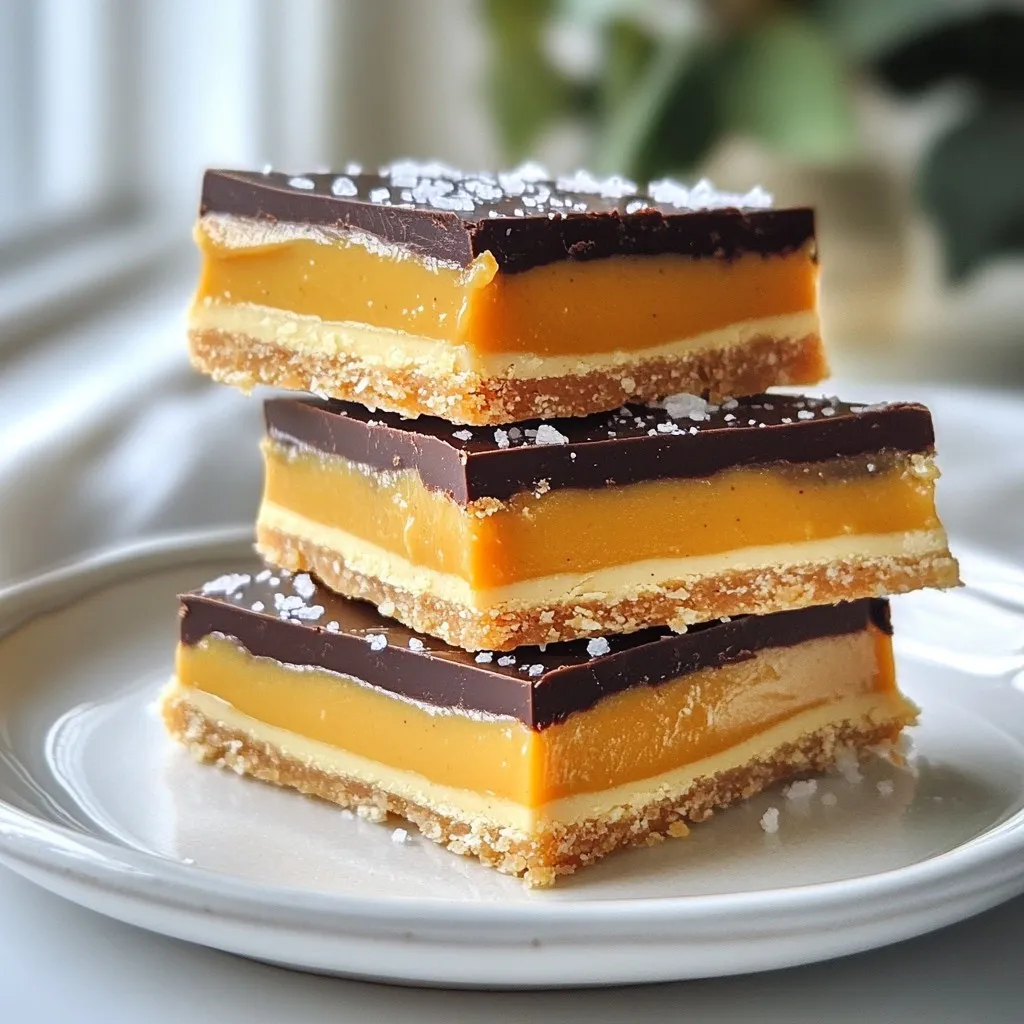
Craving a sweet treat without the guilt? You’re in the right place! These Healthy Gluten-Free Twix Bars are simple to make and loaded with flavor. I’ll walk you through each step, from crafting a crunchy crust to coating it all in rich chocolate. Plus, you’ll learn about the health benefits of your ingredients. Ready to indulge in a yummy snack that’s good for you? Let’s dive in!
Why I Love This Recipe
- Healthy Indulgence: These bars satisfy your sweet tooth while keeping it nutritious and gluten-free.
- Simple Ingredients: Made with wholesome ingredients like almond flour and natural sweeteners, making them guilt-free!
- Customizable: You can easily swap the nut butters or chocolate types to suit your taste preferences.
- Perfect for Sharing: These bars make a delightful treat for gatherings or as a sweet surprise for friends.
Ingredients
Essential Ingredients for Healthy Gluten-Free Twix Bars
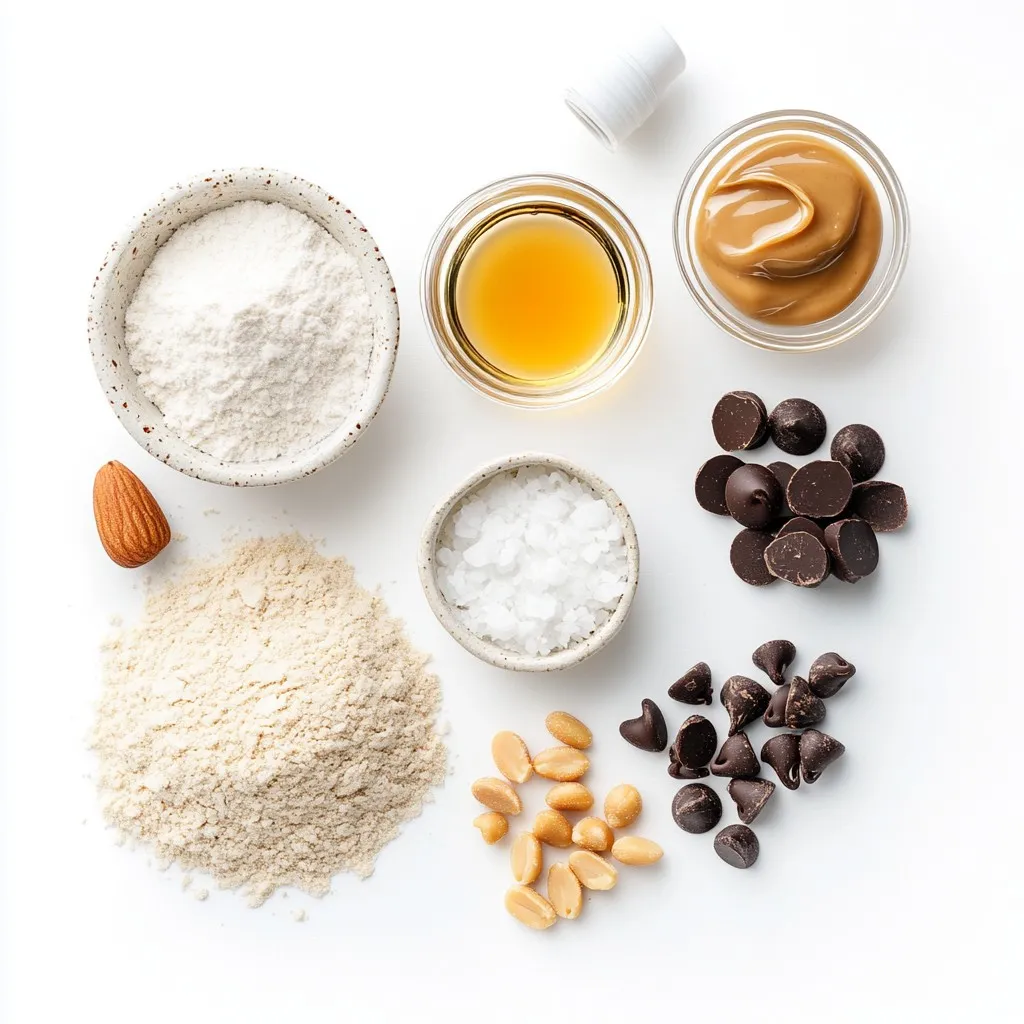
To make Healthy Gluten-Free Twix Bars, gather these key ingredients:
– 1 cup almond flour
– 1/4 cup coconut flour
– 1/4 cup maple syrup
– 1/4 cup coconut oil, melted
– 1/2 teaspoon vanilla extract
– 1/4 teaspoon salt
– 1/2 cup natural peanut butter (or almond butter)
– 1 cup dark chocolate chips (dairy-free if desired)
– 2 tablespoons coconut oil (for chocolate coating)
Each of these ingredients plays an important role in flavor and texture. The almond flour gives the bars a nutty taste while providing a gluten-free base.
Nutritional Benefits of Key Ingredients
These ingredients offer great nutrition. Almond flour is low in carbs and high in healthy fats. Coconut flour adds fiber and minerals. Maple syrup serves as a natural sweetener, rich in antioxidants. Coconut oil provides healthy fats, which can boost energy.
Peanut butter is full of protein and fiber. Dark chocolate adds antioxidants and may improve heart health. Overall, this treat is not only delicious but also offers some health benefits.
Suggested Substitutions for Allergies or Preferences
If you have allergies, here are some great swaps:
– Use sunflower seed flour instead of almond flour for nut-free bars.
– Swap maple syrup with agave nectar or honey for a different sweetness.
– Use tahini instead of peanut butter for a sesame flavor.
– Replace dark chocolate chips with carob chips if avoiding chocolate.
These substitutions keep the recipe tasty while accommodating dietary needs. Feel free to mix and match based on what you have at home!
Step-by-Step Instructions
Preparing the Crust Layer
To start, grab a medium mixing bowl. In this bowl, combine these ingredients:
– 1 cup almond flour
– 1/4 cup coconut flour
– 1/4 cup maple syrup
– 1/4 cup melted coconut oil
– 1/2 teaspoon vanilla extract
– 1/4 teaspoon salt
Mix these well until a dough forms. It should feel soft and sticky. This dough will be the base of your Twix bars.
Setting and Chilling the Crust
Now, take an 8×8 inch baking dish. Line it with parchment paper for easy removal later. Press the dough into the bottom of the dish. Spread it evenly and press firmly to create a solid crust layer. This step is key for a good texture.
Put the dish in the freezer for about 15 minutes. This will help the crust set up nicely.
Creating the Peanut Butter Layer
Once the crust is firm, it’s time to add the peanut butter. Use 1/2 cup of natural peanut butter. Spread it evenly over the crust. Use a spatula to smooth it out. Make sure the layer is even for best results.
Melting and Coating with Chocolate
Next, take a microwave-safe bowl. Add 1 cup of dark chocolate chips and 2 tablespoons of coconut oil. Microwave in 30-second bursts. Stir in between until it is fully melted and smooth. This chocolate coating will make the bars rich and tasty.
Finalizing the Bars for Serving
Remove the dish from the freezer. Pour the melted chocolate over the peanut butter layer. Spread it evenly to cover the top completely.
Return the dish to the freezer again. Chill for 30 to 60 minutes until the chocolate is set. When ready, lift the bars out using the parchment paper. Slice into desired sizes. Store them in an airtight container in the fridge or enjoy right away!
Tips & Tricks
How to Achieve the Perfect Texture
To get the best texture in your gluten-free Twix bars, focus on the crust. Use almond flour and coconut flour for a light base. Press the crust firmly into the dish. This helps it hold together well. Chill the crust before adding the peanut butter layer. A firm base will support the weight of the other layers.
Common Mistakes to Avoid
Many people skip chilling the layers. This can lead to a gooey mess. Always chill the peanut butter layer before adding chocolate. Another mistake is not mixing the crust well. Ensure the dough forms completely before pressing it into the dish. This will give you a smoother texture.
Enhancements for Flavor and Presentation
For flavor, add a pinch of sea salt on top before serving. It enhances the sweetness of the chocolate. You can also drizzle some melted chocolate on top for style. If you want more crunch, mix in chopped nuts or seeds into the crust. This adds texture and depth to your bars.
Pro Tips
- Choose the Right Nut Butter: Opt for natural peanut butter or almond butter without added sugars or oils for a healthier option.
- Chill Between Layers: Ensure each layer is thoroughly chilled before adding the next to maintain the structure and improve texture.
- Use Quality Chocolate: Choose high-quality dark chocolate for a rich flavor and excellent melting properties when coating the bars.
- Store Properly: Keep the bars in an airtight container in the refrigerator to maintain freshness and prevent them from becoming too soft.
Variations
Alternative Sweeteners for Different Diets
You can swap maple syrup with other sweeteners. Honey works great for those who are not vegan. Agave syrup is another option that is lower on the glycemic index. For a strict low-carb diet, consider using stevia or erythritol. Both sweeteners can blend well without adding extra carbs. Adjust the amount based on your taste preference, as they can be sweeter than maple syrup.
Using Different Nut Butters
While the recipe calls for peanut butter, feel free to try almond butter or cashew butter. Each nut butter gives a unique flavor and texture. If you have nut allergies, sun butter is a tasty alternative made from sunflower seeds. This option keeps the bars nut-free yet still creamy and delicious.
Customizing with Toppings or Add-ins
You can easily make these bars your own with fun toppings. Sprinkle crushed nuts, like almonds or walnuts, on top of the chocolate. For a fruity twist, add dried fruit pieces, such as cranberries or cherries. You can also swirl in a bit of chocolate hazelnut spread for extra richness. These add-ins not only boost flavor but also add a nice crunch or chewiness.
Storage Info
Best Practices for Storing Twix Bars
To keep your Healthy Gluten-Free Twix Bars fresh, store them in an airtight container. You can place them in the fridge for best results. This keeps the bars firm and tasty. Make sure to separate layers with parchment paper. This way, they won’t stick together. If you plan to eat them within a week, the fridge is fine.
Freezing Options for Longer Shelf Life
If you want to save your bars for later, freezing is a great choice. Wrap each bar in plastic wrap or foil. Then, place them in a freezer bag. This helps prevent freezer burn. They can last up to three months in the freezer. When you’re ready to enjoy them, just thaw them in the fridge overnight.
How to Reheat or Refresh Bars if Needed
If you find your bars a bit too firm after freezing, simply let them sit at room temperature for a few minutes. You can also warm them slightly in the microwave. Heat for about 10-15 seconds. This will make them soft and yummy again. Enjoy your delightful treat!
FAQs
How to make Healthy Gluten-Free Twix Bars vegan?
To make these bars vegan, simply use plant-based chocolate chips. Ensure any nut butter you choose is also vegan. You can swap honey for maple syrup if needed, as it is already vegan-friendly. This way, you get to enjoy a tasty treat without any animal products.
What is the prep and cook time for this recipe?
The prep time for these bars is about 15 minutes. After that, you need to chill the bars for around 1 hour and 15 minutes. The total time is 1 hour and 30 minutes. It’s easy to make while you do other things.
Can I use chocolate chips that are not dairy-free?
Yes, you can use regular chocolate chips if you don’t need them to be dairy-free. However, using dairy-free chips makes the recipe suitable for more diets. If you prefer, mix both types for a richer flavor.
How long do these Twix bars last in the refrigerator?
These Twix bars can last up to one week in the refrigerator. Make sure to store them in an airtight container. They will stay fresh and tasty, perfect for a quick snack.
Are these bars suitable for kids?
Yes, these bars are great for kids! They are sweet and fun to eat. Plus, you can feel good knowing they are made with healthy ingredients. Just cut them into smaller pieces for little hands.
Making your own healthy gluten-free Twix bars is easy and fun. We covered the key ingredients that make these bars both tasty and nutritious. I shared step-by-step instructions to guide you through each layer. With tips to avoid common mistakes, you can achieve the perfect texture. You also learned about variations and how to store your bars to keep them fresh. Enjoy these treats with loved ones, knowing they are both healthy and delicious. Happy bakin