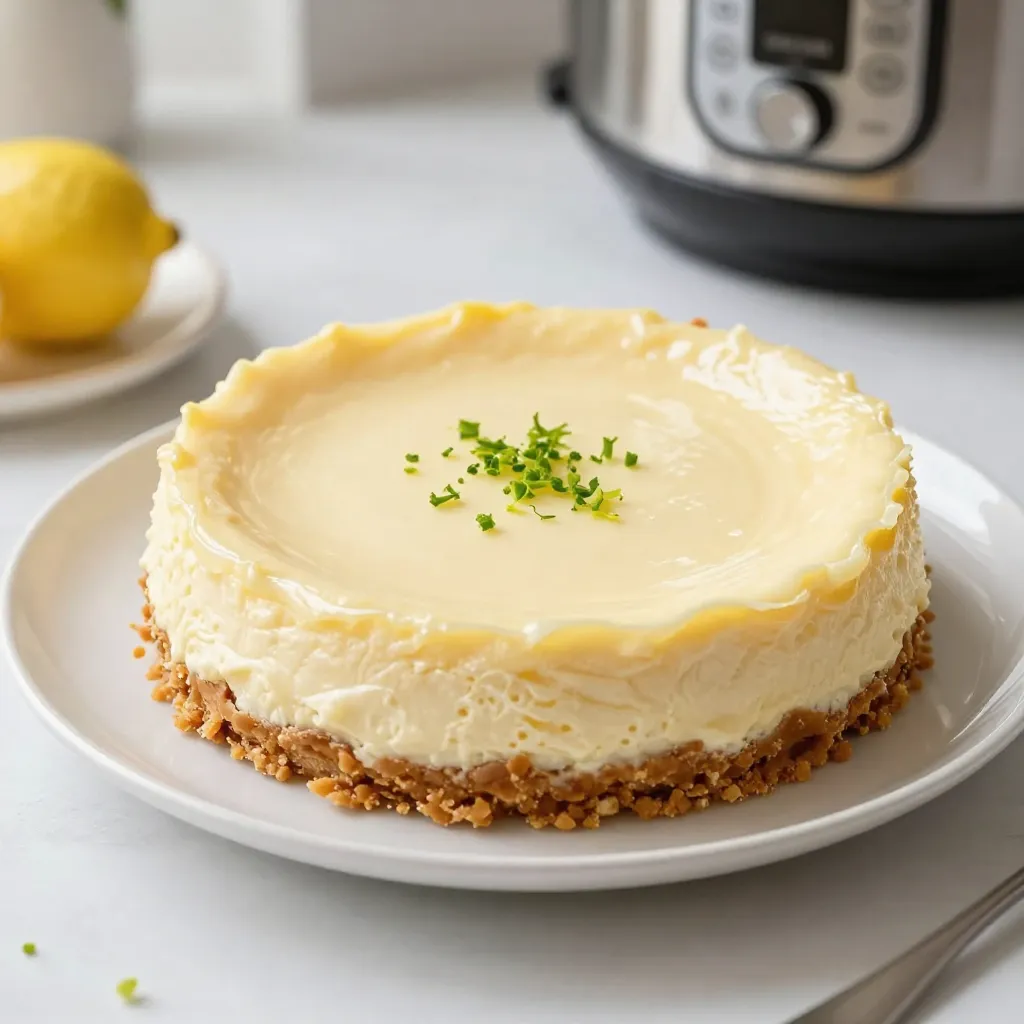
If you crave a creamy dessert with a zesty twist, you’re in for a treat! This Instant Pot Lemon Cheesecake is easy to make and bursting with flavor. With just a few simple steps, you’ll create a slice of heaven that impresses your friends and family. Join me as I share my secrets to crafting this delightful dessert that will brighten any occasion!
Why I Love This Recipe
- Creamy Texture: This cheesecake is incredibly smooth and creamy, thanks to the perfect blend of cream cheese and sour cream.
- Fresh Lemon Flavor: The addition of fresh lemon juice and zest gives this cheesecake a bright and refreshing flavor that’s perfect for any occasion.
- Quick and Easy: Using the Instant Pot significantly speeds up the cooking process, making it easier to whip up this delicious dessert in no time.
- Perfectly Chilled: The chilling time allows the flavors to meld beautifully, resulting in a cheesecake that’s both satisfying and delightful to eat.
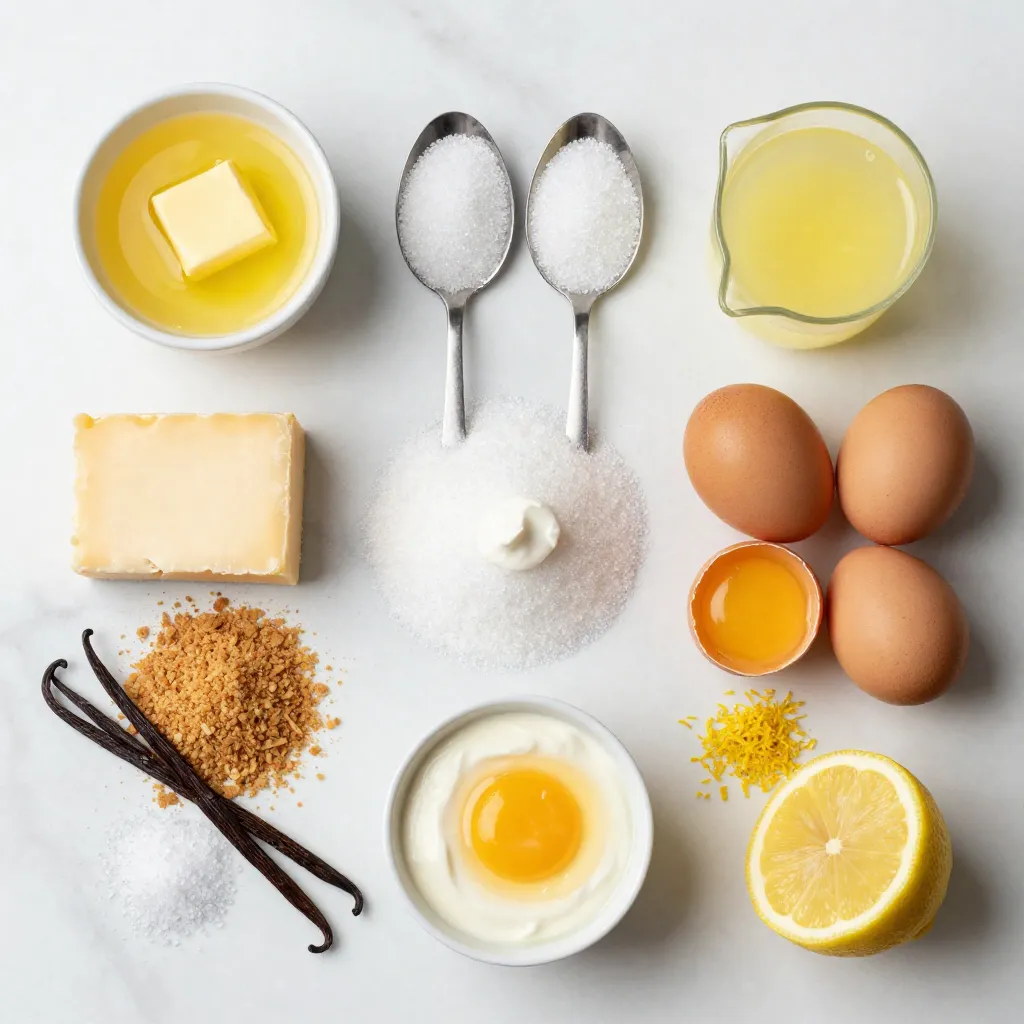
Ingredients
To make a delightful Instant Pot lemon cheesecake, gather these simple ingredients:
– 1 ½ cups graham cracker crumbs
– ½ cup unsalted butter, melted
– 2 tablespoons sugar
– 16 oz cream cheese, softened
– 1 cup granulated sugar
– 3 large eggs
– 1/4 cup sour cream
– 1/4 cup fresh lemon juice
– Zest of 2 lemons
– 1 teaspoon vanilla extract
– Pinch of salt
Each ingredient plays a key role. The graham cracker crumbs create a tasty base. The butter helps bind the crumbs together. Sugar sweetens the crust and filling. Cream cheese gives the cheesecake its creamy texture.
Lemon juice and zest provide a bright, fresh flavor. Sour cream adds richness and tang. Eggs help set the cheesecake as it cooks. Vanilla extract rounds out the flavors, while salt enhances the sweetness.
You can find these ingredients in most grocery stores. Keep them on hand for a quick and easy dessert that impresses!
Step-by-Step Instructions
Preparing the Crust
To make the crust, gather your ingredients first. In a medium bowl, mix 1 ½ cups of graham cracker crumbs, ½ cup of melted unsalted butter, and 2 tablespoons of sugar. Stir until it looks like wet sand. Press this mixture firmly into the bottom of a 7-inch springform pan. Make sure it forms an even layer. This crust will be the base for your creamy cheesecake.
Making the Filling
Now, let’s make the filling. In a large mixing bowl, beat 16 oz of softened cream cheese and 1 cup of granulated sugar together. Mix until it’s smooth and creamy. Next, add 3 large eggs one at a time, mixing well after each addition. This step ensures a fluffy texture. Then, mix in ¼ cup of sour cream, ¼ cup of fresh lemon juice, the zest of 2 lemons, 1 teaspoon of vanilla extract, and a pinch of salt. Beat until everything is well combined and smooth.
Cooking the Cheesecake
After making the filling, pour it carefully over the prepared crust in the springform pan. Use a spatula to smooth the top. Next, prepare your Instant Pot by pouring 1 cup of water into the inner pot. Place a trivet in the pot and set the springform pan on top of it. Secure the lid and set the Instant Pot to high pressure for 30 minutes. After cooking, let the pressure release naturally for 10 minutes before doing a quick release. Once done, let the cheesecake cool to room temperature. Then, refrigerate for at least 4 hours or overnight. This chilling time helps set the cheesecake perfectly.
Tips & Tricks
Perfecting the Cheesecake Texture
To get a smooth cheesecake, use room temperature cream cheese. Cold cream cheese makes lumps. Beat the cream cheese and sugar well, until it is creamy. Add eggs one by one. Mix gently after each egg. This helps keep air in the batter. The air creates a light texture. After adding lemon juice and zest, mix just until smooth. Do not overmix; that can make it dense.
Common Mistakes to Avoid
One common mistake is not preparing the crust properly. Press the graham cracker mix firmly into the pan. A loose crust may crumble when you slice it. Another mistake is not letting the cheesecake cool. If you cut too soon, it may fall apart. Always chill the cheesecake for at least four hours. Lastly, avoid skipping the natural pressure release. This step helps prevent cracks on the surface.
Serving Suggestions
Serve your cheesecake chilled for the best taste. You can garnish it with lemon slices or fresh berries. Whipped cream adds a nice touch, too! For a twist, drizzle honey or a fruit sauce on top. Pair your cheesecake with a cup of tea or coffee for a delightful dessert experience.
Pro Tips
- Use Room Temperature Cream Cheese: Ensure your cream cheese is at room temperature to achieve a smooth and creamy filling without lumps.
- Don’t Overmix: When adding eggs to the mixture, mix just until combined to avoid incorporating too much air, which can cause cracks during baking.
- Cool Gradually: Allow the cheesecake to cool to room temperature before refrigerating. This gradual cooling helps prevent cracks.
- Garnish Creatively: Enhance the presentation by garnishing with fresh berries, edible flowers, or a drizzle of lemon curd for a pop of color and flavor.
Variations
Different Flavorings
You can change the flavor of your cheesecake. Try using different citrus fruits like lime or orange. You can also add chocolate for a rich taste. Just mix in cocoa powder or melted chocolate with the filling. This gives a fun twist to the classic lemon cheesecake.
Substitutions for Dietary Restrictions
If you have dairy issues, use a dairy-free cream cheese. You can find this in stores now. For a gluten-free crust, swap graham crackers for gluten-free cookies or nuts. These changes keep the cheesecake tasty while fitting your needs.
Toppings and Garnishes
Toppings can make your cheesecake shine. Fresh berries like strawberries or blueberries add color and flavor. You can also use a dollop of whipped cream or a drizzle of chocolate sauce. For a zesty kick, add more lemon zest on top. These garnishes will wow your guests and enhance every bite.
Storage Info
How to Store Leftovers
After you slice your cheesecake, store leftovers in the fridge. Place the slices in an airtight container. This keeps the cheesecake fresh for up to 5 days. You can also cover it tightly with plastic wrap. This method helps keep moisture in and stops it from drying out.
Freezing Your Cheesecake
To freeze your cheesecake, first let it cool completely. Wrap it well in plastic wrap. Then, place it in a freezer bag or a tight container. This way, it can last up to 3 months in the freezer. When you want to enjoy it again, just thaw it overnight in the fridge.
Reheating Tips
You can enjoy your cheesecake cold, but if you want it warm, reheat it gently. Use the microwave, but heat it in short bursts. Start with 10 seconds, then check if it’s warm enough. Avoid heating too long, as it can make the cheesecake lose its creamy texture.
FAQs
Can I make this recipe without an Instant Pot?
Yes, you can make this cheesecake in a traditional oven. To do this, preheat your oven to 325°F (163°C). Prepare the crust and filling as described above. Pour the filling over the crust in your springform pan. Then, bake for 45-55 minutes or until the edges set. The center may still be jiggly, which is okay. Let it cool before chilling in the fridge.
How long does the cheesecake last in the fridge?
This cheesecake stays fresh for about 5-7 days when stored properly. Keep it covered with plastic wrap or in an airtight container. If you want to enjoy it later, remember to check for any signs of spoilage before serving.
What can I use instead of cream cheese?
If you need a swap for cream cheese, try using mascarpone cheese or ricotta cheese. Both offer a creamy texture and a mild flavor. You can also use vegan cream cheese as a dairy-free option. Adjust the sweetness if needed, as some alternatives may be sweeter.
This blog post covered the key parts of making a delicious cheesecake. We explored the simple ingredients needed, from graham crackers to fresh lemons. I shared clear steps for making and cooking your cheesecake, along with tips for perfect texture. We also discussed fun variations and how to store leftovers. Cheesecake is easy to make and enjoy in many ways. With these steps, you’ll impress anyone who tastes your treat. Grab your ingredients and get started; your cheesecake await