If you crave a sweet treat that’s quick and easy, you’ve found it! These No-Bake Oreo Cheesecake Bars are simple to make and delightfully delicious. With just a few simple ingredients, you can whip up a dessert that impresses everyone. Stick around, and I’ll guide you through each step to create this tasty dessert that needs no baking at all. Let’s dive into the world of creamy cheesecake goodness!
Why I Love This Recipe
- Deliciously Decadent: The combination of rich cream cheese and Oreo cookies creates a heavenly balance of flavors that is simply irresistible.
- Easy to Make: This no-bake cheesecake bar recipe is straightforward and requires minimal cooking skills, perfect for bakers of all levels.
- Perfect for Sharing: Cut into squares, these bars are ideal for gatherings, parties, or just a sweet treat to share with friends and family.
- Customizable Toppings: You can add your favorite toppings, such as chocolate drizzle or fresh berries, to make it even more special.
Ingredients
Main Ingredients for No-Bake Oreo Cheesecake Bars
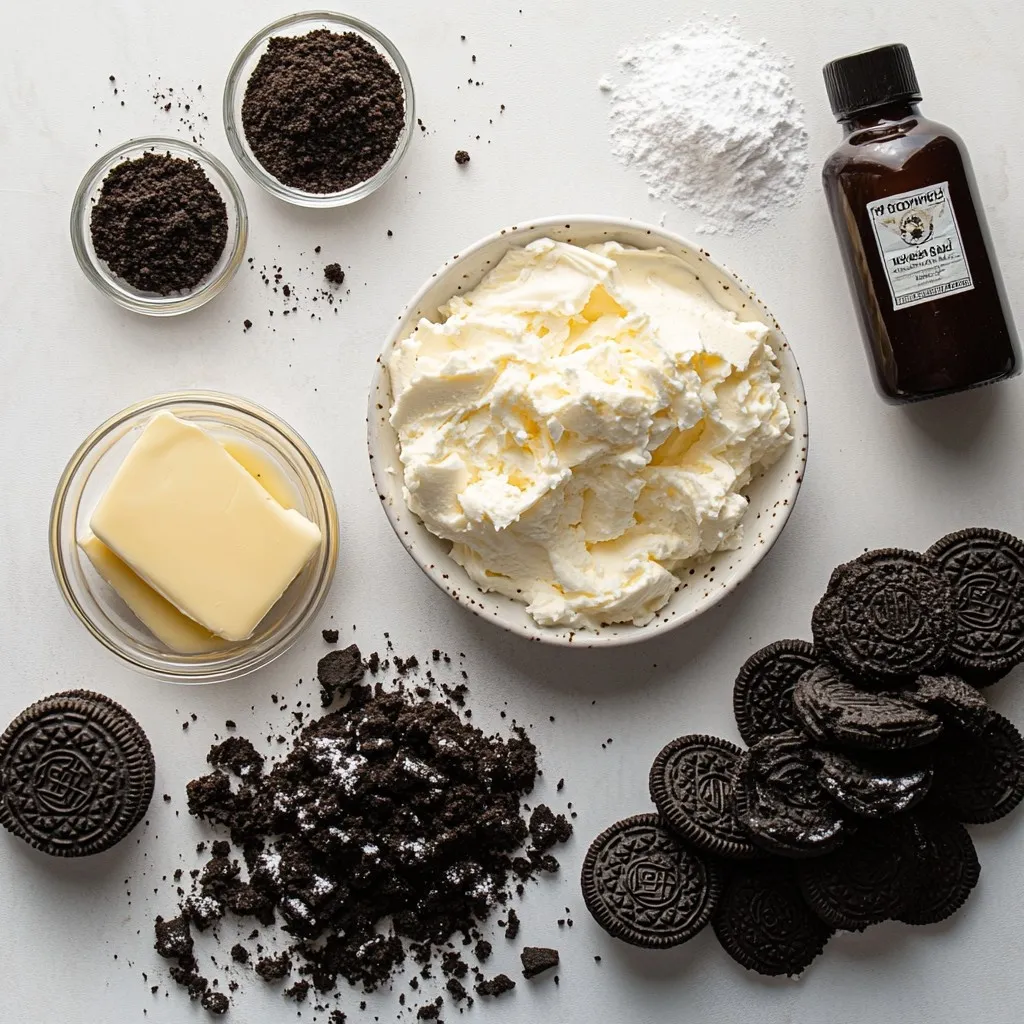
To make these tasty bars, you will need:
– 24 Oreo cookies, crushed
– 4 tablespoons unsalted butter, melted
– 2 (8 oz) packages cream cheese, softened
– 1 cup powdered sugar
– 1 teaspoon vanilla extract
– 1 cup heavy whipping cream
– Extra crushed Oreos for topping
These ingredients create the perfect blend of rich flavors. The Oreo cookies form a delightful crust. The cream cheese and whipped cream give a creamy filling that melts in your mouth.
Optional Toppings and Garnishes
You can add even more fun to your bars with these toppings:
– Whipped cream dollops
– Extra crushed Oreos
– Chocolate sauce drizzles
– Fresh berries for color
These toppings make your cheesecake bars look great and taste even better. Adding fresh berries can bring a nice tangy flavor that balances the sweetness.
Equipment Needed
To prepare your No-Bake Oreo Cheesecake Bars, gather the following items:
– Medium mixing bowl
– Large mixing bowl
– Electric mixer
– 8×8-inch square baking pan
– Parchment paper
– Spatula
This equipment helps you mix, layer, and chill your bars properly. Using parchment paper makes it easy to lift the bars out for cutting later.
Step-by-Step Instructions
Preparing the Oreo Crust
First, gather your ingredients. You need 24 Oreo cookies and 4 tablespoons of melted butter. Crush the Oreo cookies in a bowl until they are fine crumbs. This gives the perfect texture for the crust. Mix the crushed cookies with the melted butter. Stir well until the crumbs look like wet sand.
Next, take an 8×8-inch baking pan. Line it with parchment paper for easy removal. Press the Oreo mixture firmly into the bottom of the pan. Aim for an even layer. This is important for a good crust. After pressing, place the pan in the fridge for 10 to 15 minutes. This helps the crust set nicely.
Making the Cheesecake Filling
Now, let’s make the cheesecake filling. You need two packages of softened cream cheese, powdered sugar, and vanilla extract. In a large bowl, beat the cream cheese with an electric mixer. Mix until it is creamy and smooth.
Add the powdered sugar and vanilla extract. Continue to mix until everything is well blended. In another bowl, whip 1 cup of heavy cream until it forms stiff peaks. This makes the filling light and fluffy. Gently fold the whipped cream into the cream cheese mixture. Be careful to mix until no white streaks remain.
Chilling and Serving Tips
Time to layer the cheesecake! Spoon the filling over the chilled Oreo crust. Smooth the top with a spatula for an even finish. Now, sprinkle extra crushed Oreos on top. This adds a nice crunch.
Cover the pan with plastic wrap and place it in the fridge. Chill for at least 4 hours for the best texture. Overnight is even better! When ready to serve, lift the cheesecake bars from the pan using the parchment paper. Cut into squares and enjoy!
For a great presentation, serve on a white plate. Add a dollop of whipped cream and more crushed Oreos on top. This makes your bars look fancy and delicious!
Tips & Tricks
How to Achieve the Perfect Creamy Texture
To get a smooth and creamy texture, soften the cream cheese first. Cold cream cheese can create lumps. Beat it well to ensure it mixes evenly. This step is key for your cheesecake bars. When whipping the cream, make sure to get stiff peaks. This helps the filling stay light and airy. Gently fold the whipped cream into the cream cheese mixture. This keeps it fluffy and smooth.
Avoiding Common Mistakes
One common mistake is not chilling the crust long enough. If the crust is warm, it can make the filling runny. Always let it chill for at least 10-15 minutes. Another mistake is overmixing the filling. Mix just until combined to avoid air bubbles. Lastly, don’t skip the chilling time after adding the filling. It needs at least four hours to set properly.
Suggestions for Serving and Presentation
For a great presentation, serve the bars on a plain white plate. This makes the colors pop. Add a dollop of whipped cream on top for a nice touch. A sprinkle of crushed Oreos adds texture and visual appeal. You could also drizzle chocolate sauce for extra flavor. Cut the bars into even squares for a neat look.
Pro Tips
- Use Room Temperature Cream Cheese: This helps to achieve a smooth and creamy filling without lumps. Ensure your cream cheese is softened before mixing.
- Chill Thoroughly: For the best texture, allow the cheesecake bars to set in the fridge for at least 4 hours, or overnight if possible.
- Crush Oreos Finely: A finer crumb will help your crust hold together better. Use a food processor if you have one for a uniform texture.
- Customize Your Toppings: Feel free to add chocolate sauce, whipped cream, or additional toppings of your choice to enhance the presentation and flavor.
Variations
Different Crust Options
You can change the crust to fit your needs. Try using gluten-free Oreo cookies for a gluten-free treat. If you love chocolate, use chocolate sandwich cookies instead. Just crush them the same way as regular Oreos. This change adds a rich chocolate flavor.
Flavor Variations
Want to switch it up? Try adding flavors! For a minty twist, mix in a few drops of mint extract. This gives a fresh taste that pairs well with Oreos. You can also try peanut butter. Add 1/2 cup of creamy peanut butter to the cream cheese mix for a nutty flavor. Both options create a fun and tasty version of your cheesecake bars.
Alternative Toppings and Mix-ins
Toppings can change the whole dessert. Add some fresh fruit like strawberries or raspberries for a fruity touch. You can also sprinkle mini chocolate chips on top for extra sweetness. Another idea is to mix in crushed Oreos into the cheesecake filling. This adds texture and more Oreo flavor. Each option makes your bars special and fun to eat!
Storage Info
How to Store Leftover Cheesecake Bars
To keep your leftover cheesecake bars fresh, place them in an airtight container. If you used parchment paper, keep it in the pan. Cover the top with plastic wrap. This helps to prevent any drying out. Store them in the fridge for up to five days.
Freezing Instructions
You can also freeze these cheesecake bars for later. Cut the bars into squares first. Wrap each piece in plastic wrap. Then, place the wrapped bars in a freezer-safe bag. This keeps them fresh in the freezer for up to three months. When you want to enjoy them, thaw them in the fridge overnight.
Best Practices for Maintaining Freshness
To maintain the best taste, always store the bars in a cool place. Avoid leaving them out at room temperature for long. If you add toppings, like whipped cream, it’s best to add them just before serving. This keeps everything looking great and tasting fresh.
FAQs
How long do No-Bake Oreo Cheesecake Bars last?
No-Bake Oreo Cheesecake Bars can last about 5 days in the fridge. Keep them covered to stay fresh. The taste remains great, but the texture may change slightly.
Can I make these cheesecake bars ahead of time?
Yes, you can make these cheesecake bars ahead of time. In fact, it is best to chill them overnight. This helps the flavors meld together. You can enjoy them the next day, ready to impress your friends.
What can I use instead of cream cheese?
You can use Greek yogurt or mascarpone cheese as a cream cheese substitute. Both options provide a creamy texture. Greek yogurt adds a tangy flavor, while mascarpone is rich and sweet.
Can I freeze No-Bake Oreo Cheesecake Bars?
Yes, you can freeze these bars. Wrap them tightly in plastic wrap and place them in an airtight container. They will keep for about 2 months in the freezer. Thaw them in the fridge before serving.
How can I make these cheesecake bars healthier?
To make these bars healthier, you can use reduced-fat cream cheese. You can also replace some sugar with a natural sweetener. Try using less butter in the crust by adding more crushed Oreos instead.
Can I use other types of cookies for the crust?
Absolutely! You can use chocolate sandwich cookies or graham crackers. Both options will give a unique flavor. Just crush them the same way as the Oreos.
How do I know when the cheesecake bars are set?
The cheesecake bars are set when they feel firm to the touch. You can gently shake the pan. If there is little to no movement in the filling, they are ready to serve.
This blog post covered everything you need for No-Bake Oreo Cheesecake Bars. You learned about the main ingredients and optional toppings. I shared clear steps for making the crust and filling. We discussed tips for creamy texture and storage methods. Plus, I offered variations to customize your bars.
In conclusion, making these treats is easy and fun. You can impress friends with delicious flavors. Enjoy creating your own tasty versio