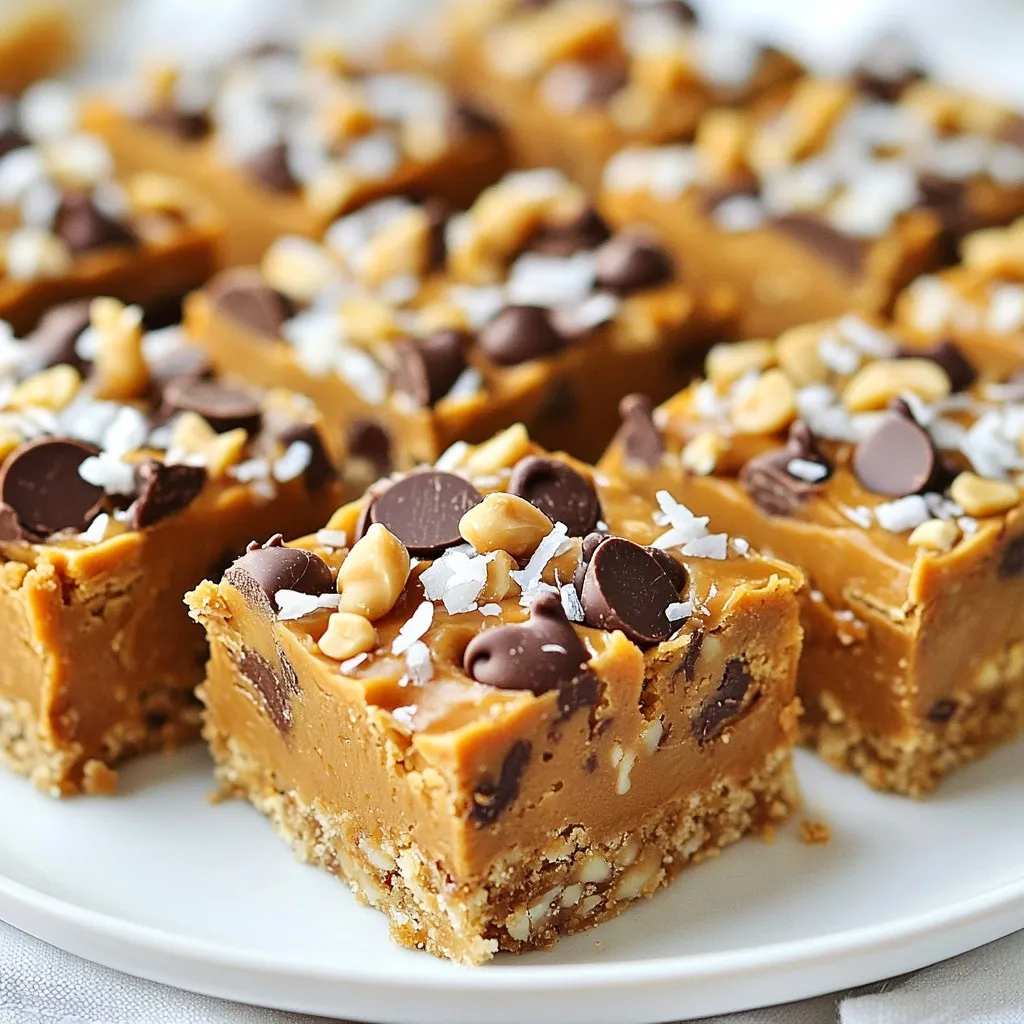
Looking for a quick treat that’s both healthy and delicious? You’re in the right place! These No-Bake Peanut Butter Bars are super easy to make and require just a few simple ingredients. Whether you need a snack or a dessert, this recipe satisfies your cravings without the oven. Follow my step-by-step guide to whip up these tasty bars in no time! Let’s get started!
Why I Love This Recipe
- Easy to Make: This recipe requires no baking, making it a quick and simple treat that anyone can whip up in minutes.
- Nutritious Ingredients: Packed with protein and healthy fats from peanut butter and nuts, these bars are a great snack for energy and nourishment.
- Customizable: You can easily swap out ingredients like nuts or sweeteners to suit your taste preferences or dietary needs.
- Deliciously Satisfying: The combination of peanut butter, honey, and chocolate makes for a mouthwatering treat that satisfies sweet cravings without guilt.
Ingredients
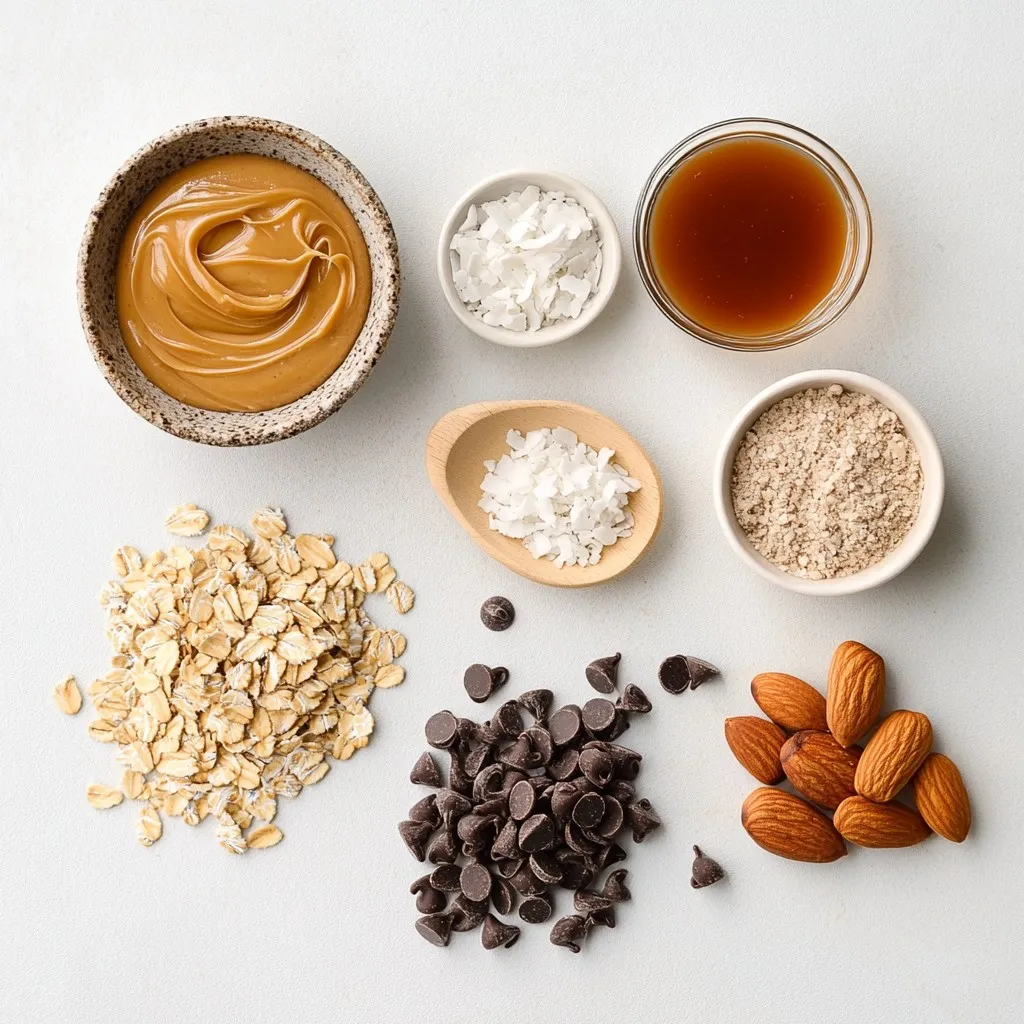
Main Ingredients for No-Bake Peanut Butter Bars
– 1 cup creamy peanut butter
– 1/2 cup honey or maple syrup
– 2 cups rolled oats
– 1/2 cup vanilla protein powder (optional)
– 1/2 cup chocolate chips (dark or milk)
– 1/4 cup shredded coconut (unsweetened)
– 1/4 teaspoon salt
– 1/4 cup chopped nuts (such as almonds or walnuts)
I love using creamy peanut butter in this recipe. It makes the bars smooth and rich. Honey or maple syrup brings just the right sweetness. Rolled oats give the bars a hearty base. If you want a protein boost, add vanilla protein powder. Chocolate chips are a must for that sweet, melty touch. Shredded coconut adds a nice texture without being too sweet. A pinch of salt balances all the flavors. Finally, chopped nuts add crunch and extra nutrients.
Optional Toppings and Add-ins
– Chocolate drizzle
– Sea salt sprinkle
– Additional nuts or seeds
If you want to take these bars to the next level, try a chocolate drizzle on top. It looks great and adds more chocolate flavor. A sprinkle of sea salt enhances the taste even more. You can also add more nuts or seeds for extra crunch and nutrition. These options let you customize each batch to your liking.
Step-by-Step Instructions
Preparation and Mixing Process
1. Start by heating a medium saucepan on low.
2. Add 1 cup of creamy peanut butter and 1/2 cup of honey (or maple syrup).
3. Stir until the mixture is smooth. Do not let it boil.
4. Remove the saucepan from heat.
5. Mix in 2 cups of rolled oats.
6. If you want, add 1/2 cup of vanilla protein powder.
7. Next, stir in 1/4 cup of shredded coconut and 1/4 cup of chopped nuts.
8. Don’t forget to add 1/4 teaspoon of salt for flavor.
9. Lastly, fold in 1/2 cup of chocolate chips.
Setting Up the Bars
1. Grab an 8×8 inch square baking dish.
2. Line it with parchment paper. Leave some paper hanging over the sides.
3. This helps you remove the bars later.
4. Pour the peanut butter mixture into the dish.
5. Use a spatula to press it down evenly.
Cooling and Cutting
1. Let the bars cool at room temperature.
2. Cover and refrigerate for at least 1 hour. This helps them set.
3. Once set, lift the bars out using the parchment paper.
4. Cut into squares or rectangles for serving.
5. Enjoy your tasty no-bake peanut butter bars!
Tips & Tricks
Common Mistakes to Avoid
– Overheating the peanut butter: Heat slowly on low. If it gets too hot, it changes texture. This can make your bars crumbly.
– Not pressing the mixture firmly enough: Press down hard with a spatula. This helps the bars stick together. Loose bars fall apart easily.
Time-Saving Tips
– Making ahead of time: You can prepare these bars a day in advance. They chill well in the fridge. This makes snack time easy.
– Using pre-measured ingredients: Have your ingredients ready before you start. This cuts down on prep time. It keeps you organized.
Enhancing Flavor and Texture
– Adding spices like cinnamon or vanilla: A little cinnamon or vanilla can add depth to the flavor. Just a pinch goes a long way.
– Mixing different nut butters: Try almond or cashew butter for a twist. Each nut butter brings its unique taste. Experiment to find your favorite mix!
Pro Tips
- Use Natural Peanut Butter: For the best flavor and texture, opt for natural peanut butter that contains only peanuts and salt, avoiding added sugars and oils.
- Customize Your Sweetness: Adjust the amount of honey or maple syrup to match your sweetness preference; consider using less if you plan to add chocolate chips.
- Chill for Best Results: Allow the bars to set in the refrigerator for at least an hour to ensure they hold together well when cut.
- Try Different Mix-ins: Feel free to experiment with various mix-ins like dried fruits, seeds, or different types of nuts for added flavor and texture.
Variations
Ingredient Swaps
You can change the nut butter in this recipe. Try almond butter or cashew butter for a new flavor. Each one adds a unique touch to the bars. As for sweeteners, honey is great, but you can also use agave syrup or maple syrup. Each sweetener brings a different taste.
Flavor Variants
Add dried fruits to your bars for a fruity twist. Raisins or cranberries work well and give a chewiness. If you’re feeling adventurous, try a s’mores version. Just mix in mini marshmallows and crushed graham crackers for a fun campfire flavor.
Dietary Adjustments
Want these bars to be gluten-free? Use gluten-free oats, and you’re set. For a vegan version, swap honey for maple syrup and use vegan chocolate chips. This makes the bars friendly for everyone at your table.
Storage Info
How to Store No-Bake Peanut Butter Bars
To keep your no-bake peanut butter bars fresh, choose an airtight container. Glass or plastic containers work well. Make sure the bars are cool before you store them. This helps avoid moisture build-up. If you live in a humid area, wrap the bars in plastic wrap before placing them in the container. This extra layer helps control humidity.
Freezing for Long-Term Storage
If you want to save bars for later, freezing is a great option. First, wrap each bar in plastic wrap. Then place them in a freezer-safe bag. Remove as much air as possible to prevent freezer burn. When you’re ready to eat, take a bar out and let it thaw in the fridge for a few hours. For quicker thawing, leave it at room temperature for about 30 minutes.
Shelf Life
In the refrigerator, no-bake peanut butter bars can last about one week. If you freeze them, they can last up to three months. Watch for signs of spoilage like an off smell or a change in color. If you see any mold, it’s best to toss them.
FAQs
Can I make these bars without protein powder?
Yes, you can make these bars without protein powder. Just skip it and use the other ingredients. The bars will still taste great and hold together well. They will have a softer texture but will still be delicious and filling.
How can I make the bars more chocolatey?
To make the bars more chocolatey, add extra chocolate chips. You can also drizzle melted chocolate on top. Another option is to mix in cocoa powder into the peanut butter mixture. This will add a rich chocolate flavor throughout the bars.
What’s the best way to cut no-bake bars?
The best way to cut no-bake bars is to use a sharp knife. First, remove the bars from the dish using the parchment paper. Then, place them on a cutting board. Warm the knife under hot water for cleaner cuts. Wipe the knife dry before cutting each time for neat squares.
Are these bars suitable for kids?
Yes, these bars are great for kids! They are simple to make and packed with wholesome ingredients. The peanut butter and oats provide energy, making them a good snack. Just be sure to watch for nut allergies.
Can I use natural peanut butter instead of creamy?
Yes, you can use natural peanut butter. It may change the texture slightly, making the bars a bit crumbly. If you do use natural peanut butter, stir it well to combine the oil before measuring. This will help the bars stick together better.
In this post, we explored the tasty world of no-bake peanut butter bars. You learned about the main ingredients, step-by-step instructions, helpful tips, and variations to try. Remember, these bars are easy to customize and perfect for any occasion. My final thought: enjoy creating your own bars that fit your taste. They are a fun, no-fuss treat everyone can enjoy. Try them today and let your kitchen shin