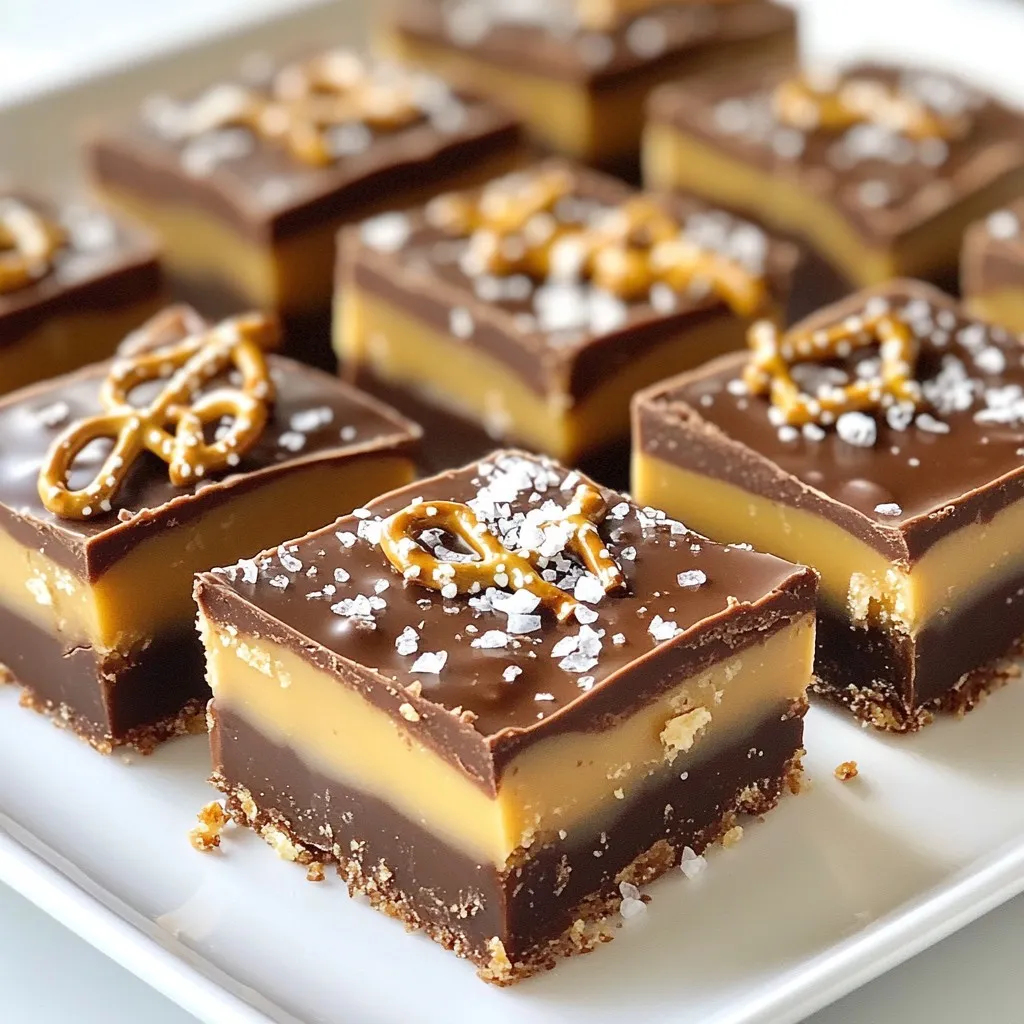
Indulge your sweet tooth with my Salted Caramel Pretzel Fudge! This treat combines rich chocolate, creamy caramel, and crunchy pretzels into one unforgettable bite. In this post, I’ll walk you through the simple steps to create this delight, share tips to perfect it, and explore fun variations. Whether you’re a seasoned baker or trying this for the first time, you’ll love how easy it is to make. Let’s dive in!
Why I Love This Recipe
- Decadent Flavor Combination: The rich semi-sweet chocolate paired with the salty pretzels creates a perfect balance of sweet and savory.
- Quick and Easy to Make: With only 15 minutes of prep time, this fudge comes together quickly, making it a perfect last-minute treat.
- Versatile Treat: You can customize this fudge by adding your favorite nuts or even experimenting with different types of chocolate.
- Impressive Presentation: The layers of fudge and caramel, topped with sea salt, make it visually stunning and perfect for any occasion.
Ingredients
Complete list of ingredients
To make the best salted caramel pretzel fudge, gather these items:
– 2 cups semi-sweet chocolate chips
– 1 cup sweetened condensed milk
– 1 cup crushed pretzels
– 1 cup caramel sauce, plus extra for drizzling
– 1 teaspoon sea salt
– 1 teaspoon vanilla extract
– ½ cup chopped pecans (optional)
Ingredient substitutes
If you need swaps, here are some ideas:
– Use milk chocolate chips for a sweeter fudge.
– Swap sweetened condensed milk with coconut milk for a dairy-free option.
– Try almond or cashew nuts instead of pecans.
– Choose gluten-free pretzels for a gluten-free treat.
– Drizzle with chocolate syrup if you run out of caramel sauce.
Importance of ingredient quality
Using high-quality ingredients makes a big difference. Fresh chocolate chips melt better and taste richer. Good caramel sauce adds depth and flavor. Always use real vanilla extract for the best taste. For pretzels, choose ones that are crunchy. Quality nuts enhance the fudge’s crunch. Great ingredients lead to a great treat.

Step-by-Step Instructions
Preparation of the baking dish
Start by lining an 8×8 inch baking dish with parchment paper. Make sure to leave some paper hanging over the edges. This will help you lift the fudge out later. The paper keeps the fudge from sticking to the dish. You want a smooth release for perfect squares.
Melting chocolate and mixing ingredients
Grab a medium saucepan and add the semi-sweet chocolate chips and sweetened condensed milk. Heat this mixture over medium heat. Stir it often until the chocolate melts completely and the mix becomes smooth. Remove the pan from heat. Now, stir in the vanilla extract. Then, fold in the crushed pretzels. If you like, add chopped pecans too. Make sure everything is mixed well.
Layering and setting the fudge
Pour half of the fudge mixture into your prepared baking dish. Spread it out evenly across the bottom. Drizzle a layer of caramel sauce on top. Then, add the rest of the fudge mixture, spreading it evenly. Drizzle more caramel sauce on top and sprinkle with sea salt. Now, place the dish in the fridge for at least 2 hours. This cooling time helps the fudge set up nicely. Once firm, use the parchment paper to lift it out. Cut it into squares and enjoy!
Tips & Tricks
Common mistakes to avoid
Making fudge can seem easy, but some mistakes can ruin your treat. Here are some common ones:
– Not measuring ingredients: Always measure carefully. Too much chocolate can make it too hard.
– Rushing the melting process: Melt chocolate on low heat. High heat will burn it.
– Skipping the parchment paper: This paper helps you lift the fudge out easily.
How to achieve the perfect texture
To get that creamy and soft fudge, follow these tips:
– Stir properly: Mix well after adding the sweetened condensed milk. This keeps the texture smooth.
– Use room temperature ingredients: Cold ingredients can cause the fudge to set unevenly.
– Cool slowly: Let the fudge cool at room temperature before refrigerating. This helps it set evenly.
Best practices for setting and serving
Setting your fudge right is key for the best taste. Here are my tips:
– Chill long enough: Refrigerate for at least 2 hours. This helps the fudge firm up.
– Lift carefully: Use the parchment paper to lift the fudge out. This prevents breakage.
– Serve with flair: Drizzle extra caramel and sprinkle more pretzels on top for a fun look.
Pro Tips
- Use Quality Chocolate: Opt for high-quality semi-sweet chocolate chips for a richer and smoother fudge flavor.
- Let it Cool: Allow the fudge to cool slightly in the pan before refrigerating to ensure even setting and prevent condensation.
- Customize Your Nuts: Feel free to substitute pecans with your favorite nuts like walnuts or almonds for a different flavor profile.
- Store Properly: Keep the fudge in an airtight container in the refrigerator to maintain its freshness for up to a week.
Variations
Adding different toppings
You can make your salted caramel pretzel fudge even better with fun toppings. Try adding crushed nuts, like almonds or walnuts, for a crunchy twist. You can also sprinkle mini chocolate chips on top for extra sweetness. Want a touch of fun? Use colorful sprinkles! These not only add color but also make your fudge look festive.
Using other types of chocolate
While semi-sweet chocolate is a classic choice, feel free to switch it up. Dark chocolate gives a rich flavor and pairs well with the sweet caramel. If you love milk chocolate, use that for a sweeter taste. You can even mix different chocolates for a unique blend. Just remember to adjust the sweetness if you change the chocolate type.
Flavor swaps with mix-ins
You can change the flavor of your fudge with mix-ins. Add a splash of peppermint extract for a minty fudge. For a fruity twist, try adding dried fruit like cranberries or cherries. Want something nutty? Swap in chopped hazelnuts or pistachios. Each mix-in will change the taste, making your fudge a new treat every time!
Storage Info
Storage tips for optimal freshness
To keep your salted caramel pretzel fudge fresh, store it in an airtight container. This helps maintain its chewy texture and rich flavor. Place parchment paper between layers to prevent sticking. Keep the container in a cool, dry place away from sunlight. If your kitchen is warm, consider refrigerating the fudge.
Freezing options
You can freeze salted caramel pretzel fudge for longer storage. First, cut the fudge into squares. Wrap each piece tightly in plastic wrap. Then, place the wrapped squares in a freezer-safe container or bag. This helps protect them from freezer burn. When ready to eat, thaw the fudge in the fridge overnight.
How long does salted caramel pretzel fudge last?
When stored properly, salted caramel pretzel fudge lasts about one week at room temperature. If you refrigerate it, it can last up to two weeks. For frozen fudge, aim to use it within three months for the best taste. Always check for any signs of spoilage before enjoying your treats!
FAQs
How do I make salted caramel from scratch?
To make salted caramel, start with sugar. Heat one cup of sugar in a pot over medium heat. Stir it gently until it melts and turns amber. Then, add half a cup of heavy cream slowly. Be careful; it will bubble up. Stir until smooth. Finally, add a pinch of sea salt. Let it cool before using. This rich caramel adds depth to your fudge.
Can I use gluten-free pretzels?
Yes, you can use gluten-free pretzels! Many brands offer gluten-free options. Just make sure to check the label. Gluten-free pretzels will give your fudge the same crunchy texture. They will still pair perfectly with the sweet caramel and chocolate. Enjoy your treat without worry!
What is the best way to cut fudge?
The best way to cut fudge is to use a sharp knife. First, let the fudge cool completely in the fridge. Next, lift the fudge from the dish using the parchment paper. Place it on a cutting board. Wipe the knife with a damp cloth after each cut. This helps create clean edges. Cut into squares for a neat presentation.
In this post, I covered the key steps to make salted caramel pretzel fudge. I shared a complete list of ingredients and their substitutes, highlighting the importance of quality. You learned about the preparation, melting, layering, and setting of the fudge. I also shared tips to avoid common mistakes and achieve the right texture.
Remember, the best fudge comes from fresh ingredients and practice. Enjoy experimenting with toppings and flavors. With these tips, you’re set to create a delicious treat that impresses everyone. Happy bakin