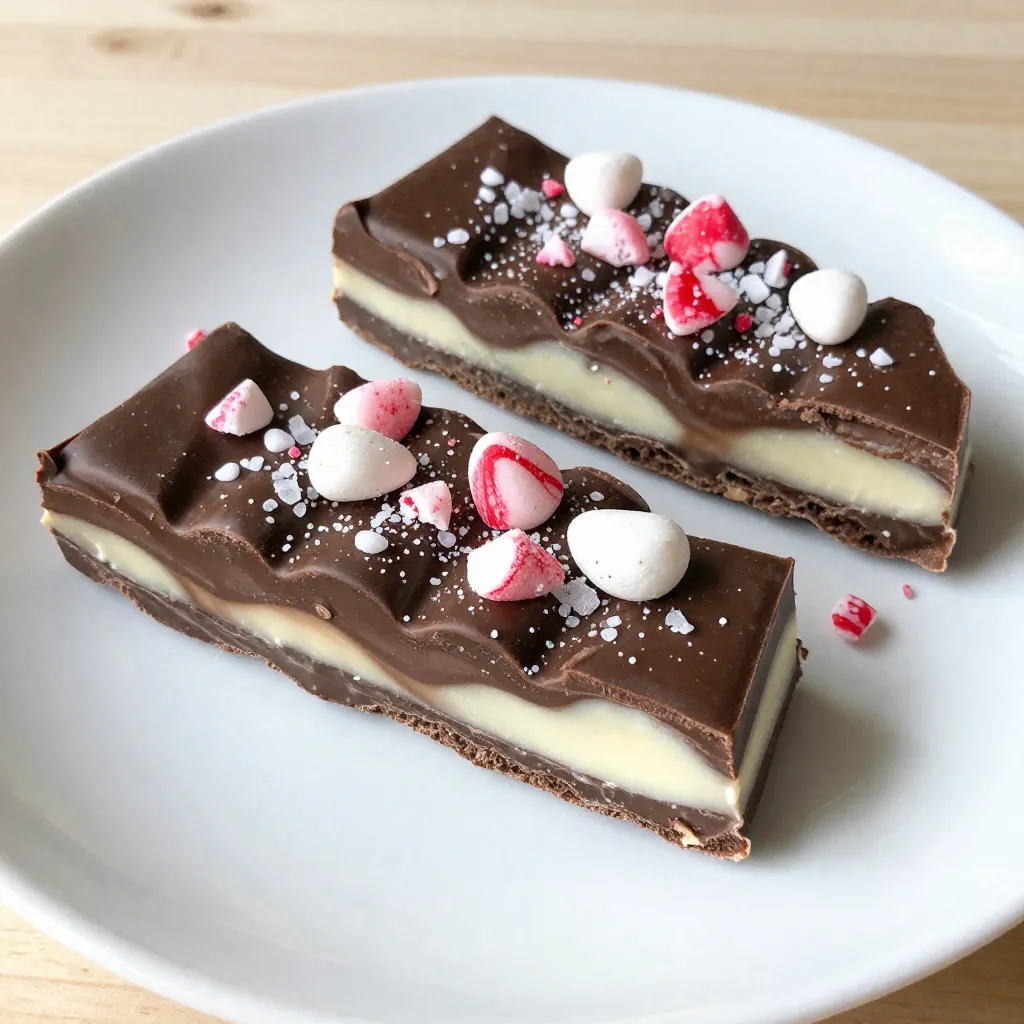
Are you ready to elevate your holiday treats? My Triple Chocolate Peppermint Bark combines rich dark, creamy milk, and sweet white chocolate. Topped with crunchy peppermint candies and a sprinkle of sea salt, it’s an irresistible combination. This treat is not just a feast for your taste buds but also a perfect gift. Join me as we dive into the simple steps to make this festive delight!
Why I Love This Recipe
- Decadent Layers: This recipe features three rich layers of chocolate, creating a deliciously indulgent treat that satisfies every chocolate lover’s cravings.
- Refreshing Peppermint Twist: The addition of peppermint extract and crushed peppermint candies adds a refreshing holiday flavor, making it perfect for festive gatherings.
- Easy to Make: With simple melting and layering techniques, this bark is easy enough for even novice bakers to create impressive results.
- Customizable Treat: You can easily modify this recipe by using different types of chocolate or toppings, allowing for creativity in every batch.
Ingredients
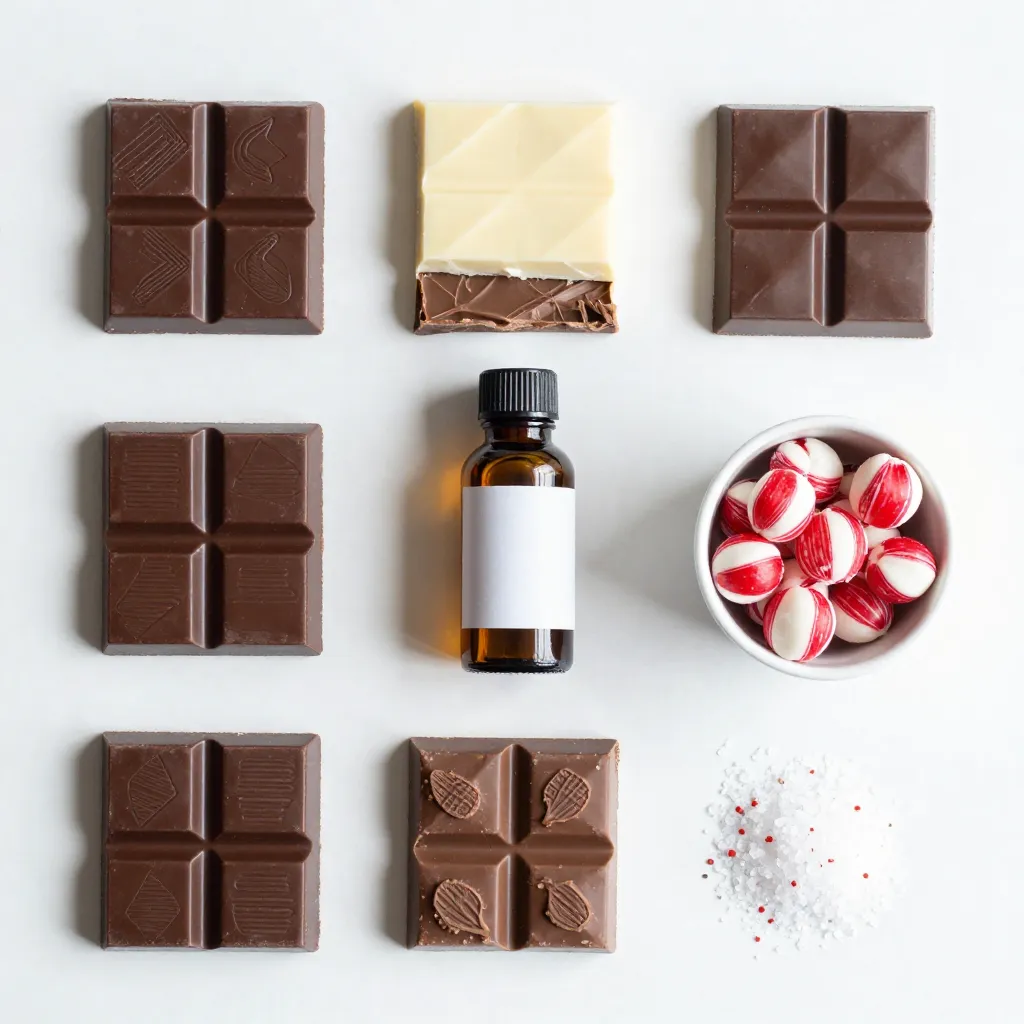
Detailed Ingredients List
– Dark Chocolate: 8 oz, chopped
– Milk Chocolate: 8 oz, chopped
– White Chocolate: 8 oz, chopped
– Peppermint Extract: 1 teaspoon
– Crushed Peppermint Candies: 1 cup
– Sea Salt: for garnish
I love the mix of three chocolates in this recipe. Dark chocolate brings a rich taste. Milk chocolate adds a sweet creaminess. White chocolate gives it a smooth finish. Each layer is special.
You will need peppermint extract for a fresh flavor. It makes the bark taste like the holidays. The crushed peppermint candies add a nice crunch and festive look.
The sea salt is a secret touch. It balances the sweetness of the chocolate. When you take a bite, you’ll taste all the flavors together.
Gather these ingredients before you start. It makes the process easier. This bark is not just a treat; it’s a fun way to share joy during the holidays.
Step-by-Step Instructions
Preparing the Pan
To start, you need to line your baking sheet with parchment paper. This step helps the bark come out easily later. Cut the parchment paper to fit the sheet and let the edges hang over a bit. This overhang makes it much easier to lift the bark out when it’s set.
Melting and Layering Chocolates
First, let’s melt the dark chocolate. Place the chopped dark chocolate in a microwave-safe bowl. Heat it in the microwave for 30 seconds at a time. Stir after each interval. Keep heating until it’s smooth and melted.
Once melted, pour the dark chocolate onto the lined baking sheet. Use a spatula to spread it evenly. Make sure to tap the baking sheet on the counter to remove air bubbles. Next, chill this layer in the fridge for about 15 minutes until it sets.
Now, repeat this process with the milk chocolate. Melt it in the microwave just like you did with the dark chocolate. After it’s melted, pour it over the dark chocolate layer. Spread it out evenly and tap the baking sheet again. Chill for another 15 minutes.
Finally, melt the white chocolate. Do this in a separate bowl using the same microwave method. After it’s melted, mix in a teaspoon of peppermint extract. Carefully pour the white chocolate over the milk chocolate, spreading it evenly.
Final Assembly and Setting
While the white chocolate is still warm, sprinkle the crushed peppermint candies on top. Make sure to press them down lightly so they stick well. This adds a nice crunch and flavor.
After that, place the baking sheet back in the fridge for about 30 minutes. This chilling time lets all the layers set completely. Once set, take it out and peel off the parchment paper. Finally, break the bark into pieces of your choice. For a finishing touch, sprinkle a little sea salt on top for added flavor.
Tips & Tricks
Perfecting the Chocolate Melting Process
To melt chocolate in the microwave, use a microwave-safe bowl. Place chopped chocolate in the bowl. Heat it in 30-second bursts. Stir after each interval. This helps avoid overheating. If chocolate gets too hot, it can seize and clump.
Use low power settings if you have trouble. Aim for a smooth and silky texture. If you see lumps, stir more. They often melt away with stirring.
Achieving the Ideal Texture
For even layers, spread the melted chocolate carefully. Use a spatula to make a smooth surface. Tap the baking sheet on the counter to release air bubbles. This helps create a nice, flat layer.
After each layer, chill the chocolate. This helps it set properly before adding the next layer. Wait about 15 minutes for each layer. Make sure the chocolate is firm before moving on to the next step.
Customizing Flavor and Presentation
Add fun flavors to your bark. Try orange zest or even espresso powder. These can add a nice twist to the usual taste. You can also mix in other candies like almonds or dried fruit.
For a festive look, use colorful sprinkles or edible glitter. You can also drizzle more melted chocolate on top. This adds a nice visual touch. Have fun with it, and let your creativity shine!
Pro Tips
- Use Quality Chocolate: For the best flavor and texture, opt for high-quality chocolate brands that contain real cocoa butter.
- Chill Between Layers: Ensure each chocolate layer is fully set before adding the next to prevent them from mixing.
- Crush Peppermint Candies Finely: Crushing the peppermint candies into smaller pieces allows for better distribution and easier eating.
- Experiment with Flavors: Try adding different extracts like vanilla or almond to the white chocolate for a unique twist on flavor.
Variations
Alternative Chocolate Options
You can switch the types of chocolate in your bark. For a richer taste, try semi-sweet or dark chocolate. These choices add depth to the flavor. If you want something sweeter, use milk chocolate instead. For those who love white chocolate, you can substitute with vanilla-flavored chocolate. This keeps the bark creamy and sweet.
Flavor Innovations
Get creative with flavors! Try adding a hint of orange zest for a fresh twist. A pinch of cinnamon or nutmeg can also spice things up. You can even mix in your favorite candy, like crushed almonds or pretzels. This gives your bark extra crunch and fun flavors.
Dietary Modifications
Want to make it vegan-friendly? Use dark chocolate that has no dairy. You can also replace the milk chocolate with a dairy-free option. For gluten-free bark, all the ingredients here are naturally gluten-free. Just check the labels to avoid any hidden gluten. This way, everyone can enjoy your tasty treat!
Storage Info
Best Practices for Storing Peppermint Bark
To keep your peppermint bark fresh, store it in an airtight container. This will help keep moisture out and keep the bark crisp. You can layer the bark with parchment paper to avoid sticking. For the best taste, eat the bark within two weeks.
Temperature Considerations
Store your peppermint bark in a cool, dry place. A pantry works well. You can also keep it in the fridge, but be careful. Sudden temperature changes can cause the chocolate to bloom. Bloom appears as white streaks on the chocolate but is safe to eat.
Signs of Spoilage
To check if your peppermint bark is still good, look for changes in smell or texture. If it smells off or feels sticky, it may be bad. Also, watch for any signs of mold. To maintain quality, always use clean utensils when handling the bark.
FAQs
How long does homemade peppermint bark last?
Homemade peppermint bark lasts about two weeks when stored properly. To keep it fresh, place it in an airtight container. I recommend putting parchment paper between layers to avoid sticking. Store it in a cool, dry place, away from heat or sunlight.
Can I use different types of candy for toppings?
Yes, you can use different candies for toppings. Try crushed nuts like almonds or walnuts for crunch. Dried fruits like cranberries or cherries add a nice pop of flavor. You can even use mini marshmallows for a fun twist!
Is peppermint extract necessary for the recipe?
Peppermint extract adds a strong mint flavor. If you don’t have it, you can skip it, but the taste will change. You can also use peppermint oil as a substitute. Just remember, a little goes a long way!
Can I make peppermint bark ahead of time?
You can make peppermint bark ahead of time. It stores well, so feel free to prepare it a few days before your event. Just make sure to store it in an airtight container. This way, it will stay fresh and tasty for your guests!
This blog post detailed how to make delicious peppermint bark, from ingredients to storage. You learned to layer dark, milk, and white chocolate for tasty results. We covered tips for melting chocolate and suggested alternatives for flavor. You can customize your bark to fit your taste. Proper storage keeps your candy fresh longer. Overall, making peppermint bark is simple and fun. Enjoy sharing it with friends and family this holiday seaso