Are you ready to impress your friends with a dessert that screams elegance? This Vanilla Bean Crème Brûlée recipe is simple yet stunning. With just a few key ingredients, you can create a creamy custard topped with a perfectly caramelized layer. Whether you’re hosting a dinner or treating yourself, this delight promises to satisfy your sweet cravings. Let’s dive into this rich, velvety dessert that brings joy to every table!
Why I Love This Recipe
- Indulgent Flavor: The combination of rich heavy cream and aromatic vanilla bean creates a luxurious flavor that is simply irresistible.
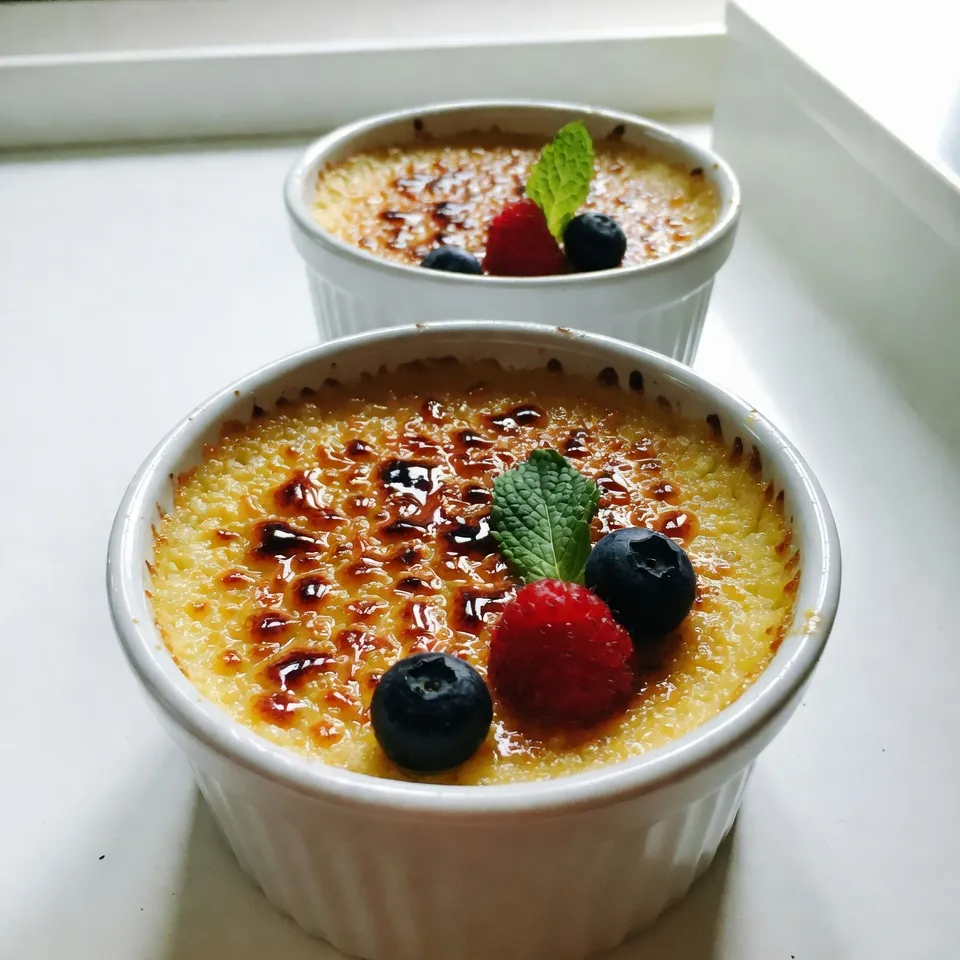
- Elegant Presentation: The beautiful caramelized sugar topping gives a stunning visual appeal, making it perfect for special occasions.
- Customizable Delight: You can easily tweak this recipe by adding different flavors like chocolate or citrus zest for a unique twist.
- Simple Yet Impressive: Despite its fancy reputation, the steps are straightforward, allowing anyone to impress their guests effortlessly.
Ingredients
List of Ingredients
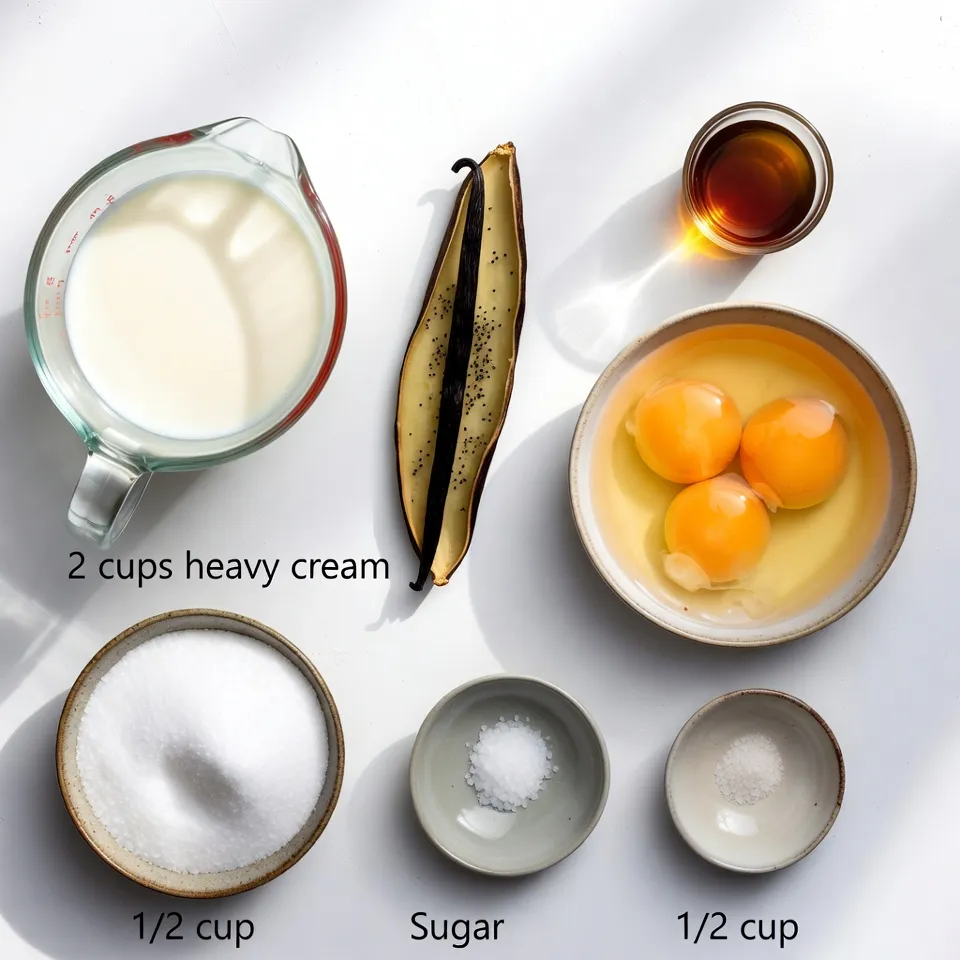
– 2 cups heavy cream
– 1 vanilla bean (split and scraped)
– 5 large egg yolks
– 1/2 cup granulated sugar (plus extra for caramelizing)
– 1 teaspoon pure vanilla extract
– A pinch of salt
The right ingredients make all the difference in vanilla bean crème brûlée. The heavy cream gives the dish its rich base. The vanilla bean brings a deep flavor that you cannot get from vanilla extract alone. Make sure to scrape out the seeds to release the full aroma.
Use large egg yolks for a creamy texture. Combine these with granulated sugar to sweeten the mix. A pinch of salt balances the sweetness and enhances the flavors.
By choosing pure vanilla extract, you add another layer of richness. This combination of ingredients creates a simple yet elegant dessert that impresses everyone.
Step-by-Step Instructions
Preheating and Preparing Ingredients
1. Preheat your oven to 325°F (160°C). This step is key for even baking.
2. In a saucepan, combine 2 cups of heavy cream with 1 split vanilla bean. Add the seeds too. Heat this mixture over medium heat until it’s hot, but not boiling. Stir it occasionally.
3. Remove the saucepan from the heat and let it steep for 15 minutes. This helps the vanilla flavor grow strong.
Mixing the Custard Base
1. In a mixing bowl, whisk together 5 large egg yolks, 1/2 cup of sugar, and a pinch of salt. Mix until it looks lighter in color.
2. Pour the warm cream slowly into the egg yolk mixture. Whisk as you pour. This step is called tempering. It stops the eggs from cooking too fast.
Baking and Cooling the Crème Brûlée
1. Strain the mixture through a fine sieve into a large measuring cup. This keeps your custard smooth.
2. Divide the custard evenly into ramekins. Place them in a baking dish.
3. Fill the baking dish with hot water until it reaches halfway up the sides of the ramekins. This water bath helps the custard bake gently.
4. Bake for 30 to 35 minutes. The edges should be set, but the centers can still jiggle a bit.
5. Take the ramekins out of the water bath and let them cool at room temperature.
6. Once cooled, cover the ramekins with plastic wrap. Refrigerate for at least 4 hours, or overnight. This helps the custard set fully.
Tips & Tricks
Achieving the Perfect Texture
To make a smooth and creamy vanilla bean crème brûlée, control the temperature. Heat the cream to just below boiling. If the cream boils, it can change texture. This can lead to a grainy custard. When mixing the warm cream with egg yolks, whisk constantly. This helps prevent scrambled eggs.
Best Practices for Caramelizing Sugar
Caramelizing sugar gives your dessert a lovely top. You can use a kitchen torch or a broiler. A kitchen torch gives you more control over the heat. If you use a broiler, watch closely. Sugar can burn quickly. For even caramelization, sprinkle a thin layer of sugar. Do not pile it on. Thin layers melt and caramelize better.
Presentation and Serving Suggestions
Serving is just as important as making the dessert. Keep your crème brûlée in the ramekins. To make it pretty, add fresh berries or a mint sprig on top. Serve with a small spoon for a nice touch. For the best flavor, serve it cold. Let it sit for a minute after caramelizing. This will help the sugar harden into a perfect crust.
Pro Tips
- Choose Quality Vanilla: Using a high-quality vanilla bean will enhance the flavor of your crème brûlée significantly. Look for beans that are plump and fragrant.
- Temper the Eggs Carefully: To avoid scrambling the eggs, pour the hot cream mixture slowly into the egg yolks while whisking continuously. This gradual process helps maintain a smooth custard.
- Perfect Water Bath: Ensure that the water is hot but not boiling when you place the ramekins in the baking dish. This helps the custards cook evenly without curdling.
- Caramelizing Sugar Tips: Spread the sugar evenly over the custard before caramelizing for a uniform crust. If using a broiler, keep a close eye to prevent burning.
Variations
Flavor Variations
You can get creative with flavors in your vanilla bean crème brûlée. Try adding orange zest for a citrus twist. Just a teaspoon will brighten the dish. Mint is another great option. A few fresh leaves mixed in adds a refreshing note. You can also make a chocolate-infused version. Simply melt some dark chocolate into the cream. For coffee lovers, brew a strong espresso. Mix it into the cream for a delightful coffee crème brûlée. These variations keep your dessert exciting!
Dietary Modifications
If you need dairy-free options, use coconut cream instead of heavy cream. It gives a rich taste. For a lighter option, almond milk works well too. To make your brûlée sugar-free, substitute granulated sugar with erythritol or monk fruit sweetener. These alternatives will not affect the texture. Both options provide sweetness without the calories. Just keep in mind the taste might change slightly.
Serving Suggestions
Pair your crème brûlée with a glass of dessert wine. A sweet Sauternes or a rich port can enhance the flavors. If you prefer warm drinks, serve it alongside a cup of coffee or tea. The bitterness of coffee balances the sweet dessert. You can also garnish your brûlée with fresh berries or a sprig of mint. It makes for an elegant presentation. Remember to serve it chilled for the best enjoyment!
Storage Info
How to Store Prepared Crème Brûlée
To keep your crème brûlée fresh, place each ramekin in the fridge. Cover them with plastic wrap to avoid any odor from other foods. This helps maintain the rich flavor. Make sure the wrap does not touch the sugar topping. This keeps the sugar from getting soggy.
Freezing Instructions
You can freeze crème brûlée, but it’s tricky. First, let it cool completely. Cover it tightly with plastic wrap. Then, wrap it in foil for extra protection. When you want to enjoy it, thaw it in the fridge overnight. After thawing, you should caramelize the sugar topping again for the best texture.
Shelf Life
Crème brûlée stays fresh in the fridge for about three days. After that, the texture may change. If you freeze it, aim to eat it within a month. This ensures you enjoy the best taste and texture.
FAQs
Can I make Crème Brûlée in advance?
Yes, you can make Crème Brûlée ahead of time. This dish needs time to chill. Make it a day or two before serving. Just prepare the custard and chill it in the fridge. Cover the ramekins tightly with plastic wrap. This helps keep them fresh and ready for your special occasion.
How do I prevent my Custard from curdling?
To avoid curdling, watch your heat. Heat the cream but do not boil it. When you mix the cream with egg yolks, pour slowly. This is called tempering. Whisk constantly while adding cream to the yolks. This keeps the eggs from cooking too fast.
What can I use if I don’t have a kitchen torch?
If you lack a kitchen torch, don’t worry! You can use your oven’s broiler. Simply sprinkle sugar on top of the custard. Place the ramekins under the broiler for 1 to 2 minutes. Stay close and watch carefully to avoid burning. This method gives you a nice caramel crust, too!
This blog post laid out all you need to know to make perfect crème brûlée. We covered the key ingredients, step-by-step instructions, and essential tips to achieve that creamy texture. You also learned about variations, storage, and common questions.
In closing, mastering this classic dessert opens doors to creativity in your kitchen. The simple ingredients can transform into a delightful treat. Enjoy experimenting and sharing your delicious results with other